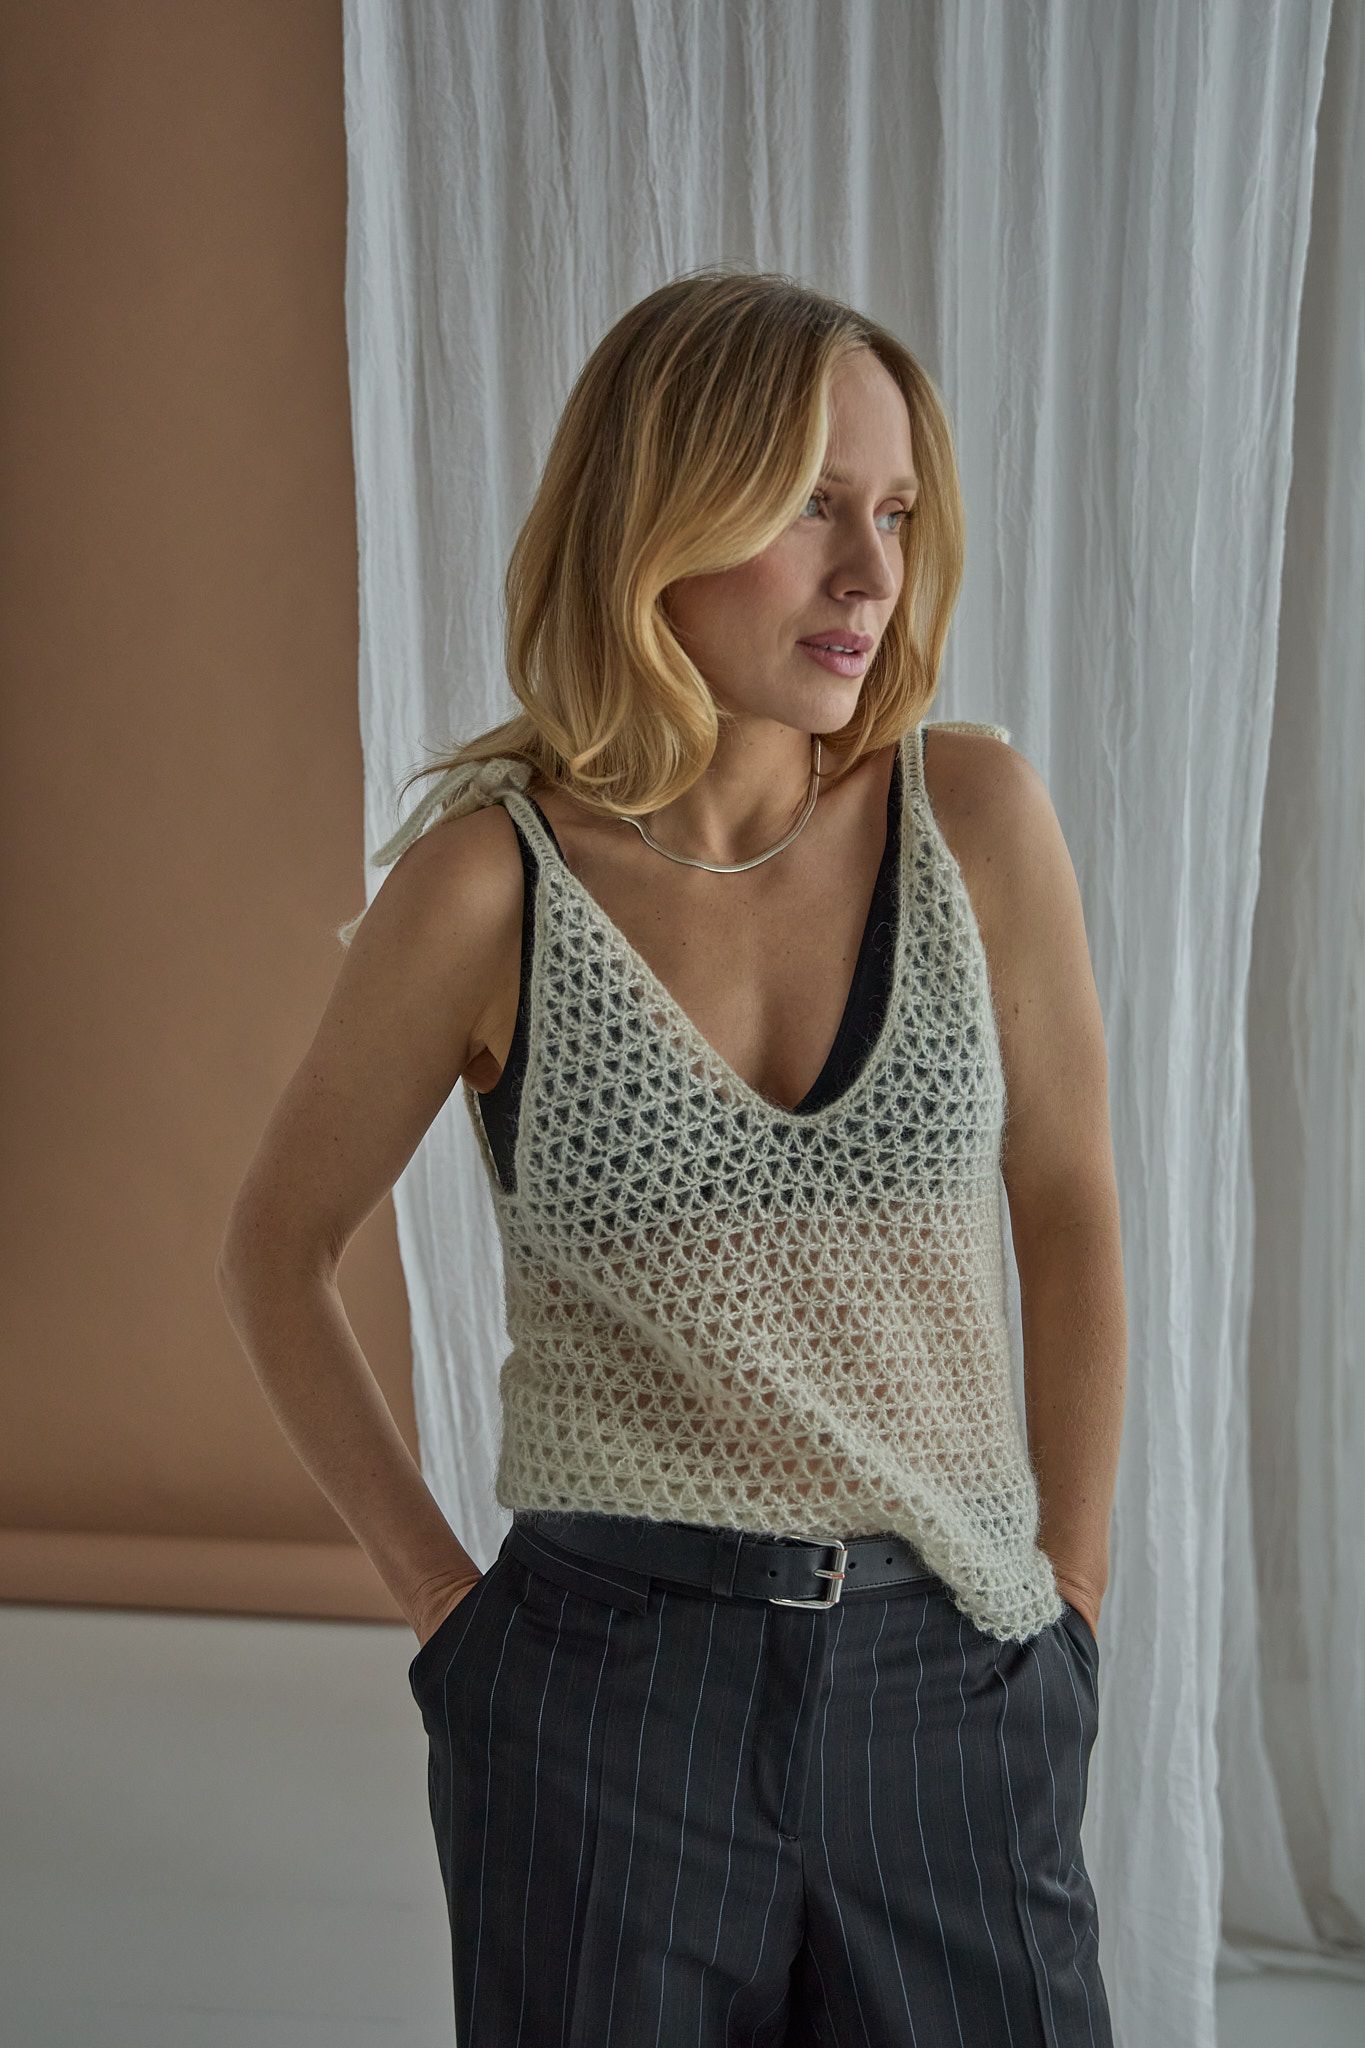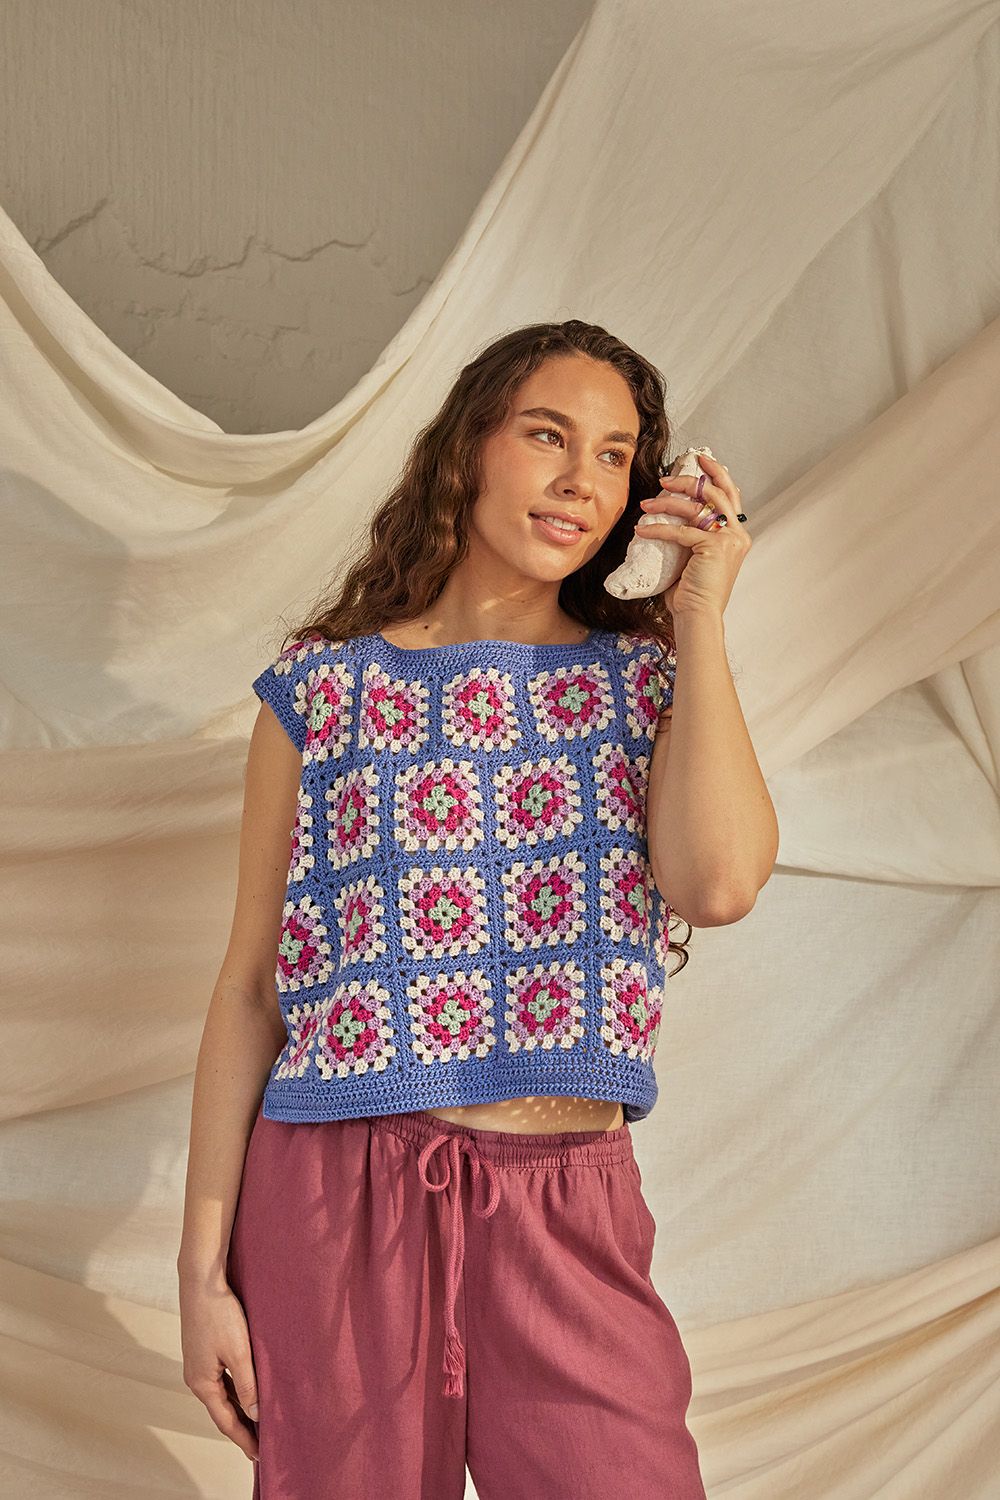
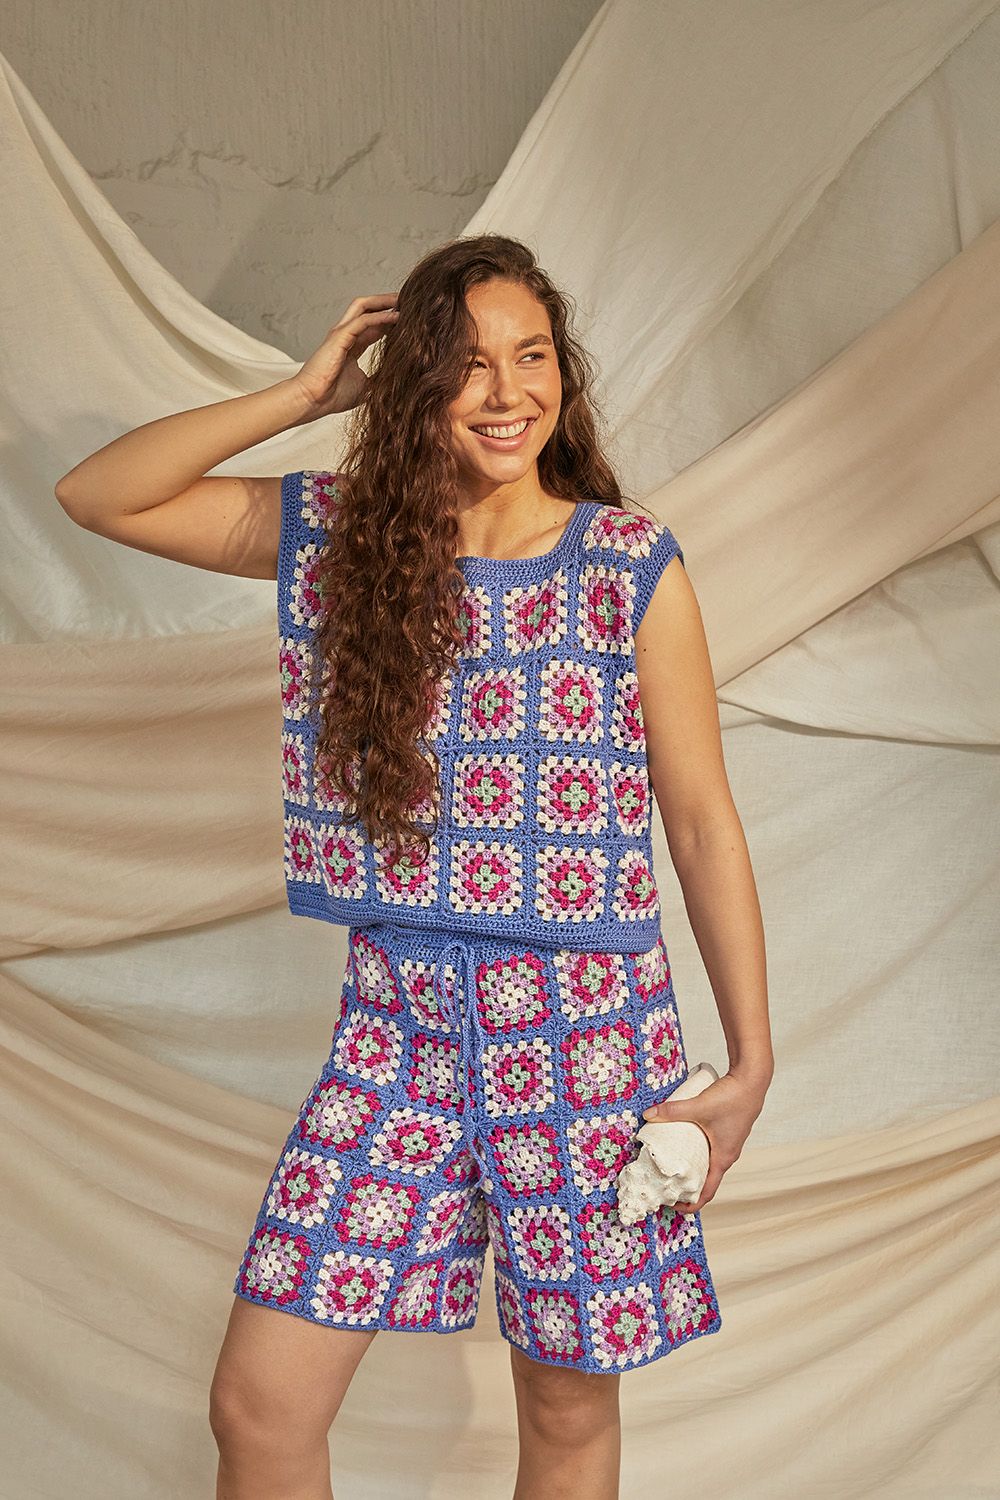
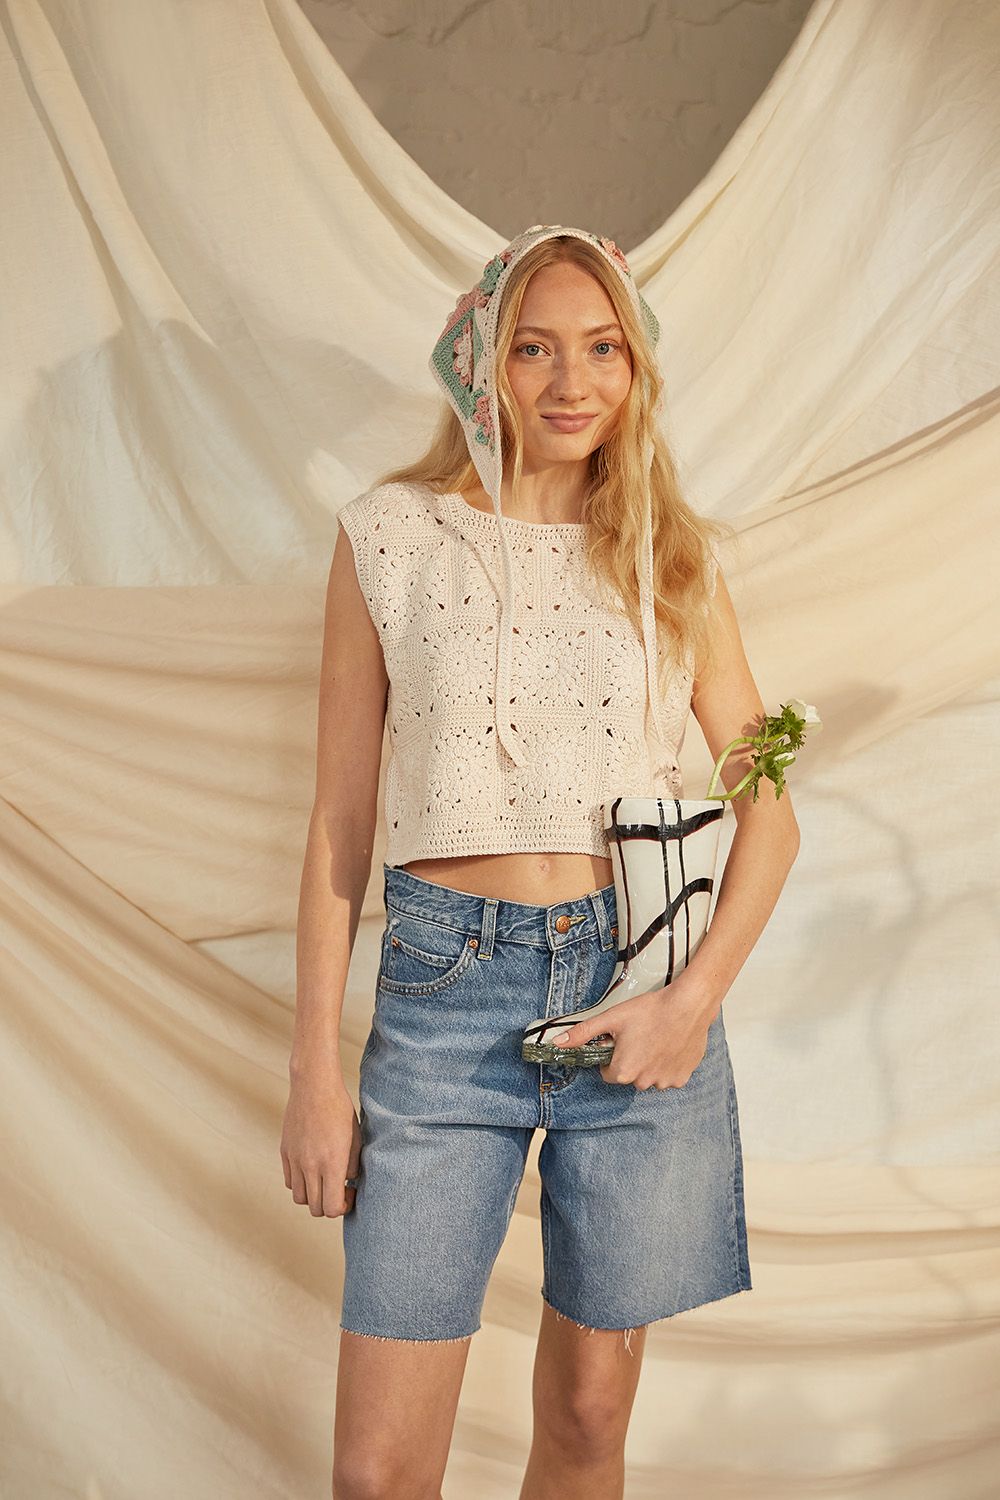
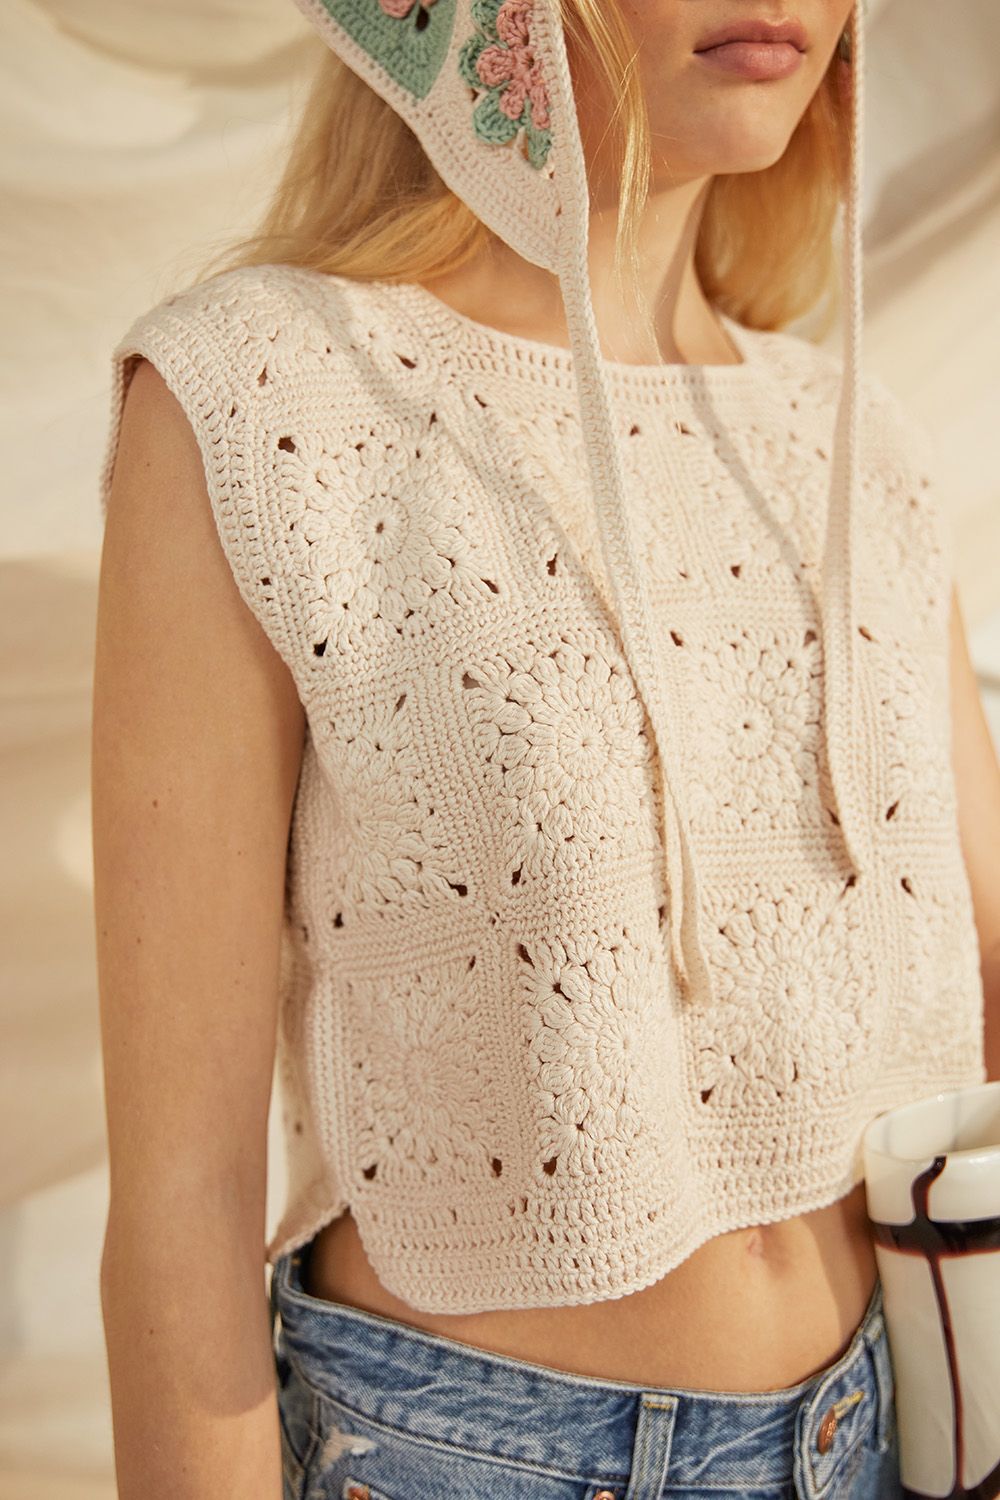
Pouta Granny Square Top
The trendiest outfit of the summer is made from crocheted squares!
You can make this top using traditional granny squares, flat flower motifs, raised flower motifs – or by combining different types of squares together! See detailed instructions for the squares here.
Designer
Sisko Sälpäkivi
Size(s)
S/M(L)XL/XXL Sample garment size S/M (solid-color top) and XL/XXL (multicolor top)
Finished dimensions
bust circumference 100(110)120 cm / 40(44)48”
length at center back approx. 44(44)54 cm / 17.5(17.5)21.5” + neck edge 2(2)3 cm / 0.75(0.75)1.25”
Yarn demand
Novita Sointu Flat flower granny square top (solid-color): (020) soprano 400(450)650 g Simple granny square top (multicolor): (167) lento 150(150)200 g (020) soprano 80(80)110 g (748) scale 60(60)80 g (546) encore 40(50)60 g (320) harmony 30(30)40 g
Needles and other supplies
Crochet hook Novita 3.5 mm / US E-4 or size needed
Finished dimensions
bust circumference 100(110)120 cm / 40(44)48”
length at center back approx. 44(44)54 cm / 17.5(17.5)21.5” + neck edge 2(2)3 cm / 0.75(0.75)1.25”
Abbreviations and stitches used See instructions for the granny squares.
Gauge Granny square (whole piece) approx. 10 x 10 cm / 4 x 4”
Notes If you use different granny square designs in one project, you may need to use different hook size for different squares to ensure the pieces are the same size. Please note that yarn consumption varies depending on the yarn used and the granny square design chosen.
Granny squares
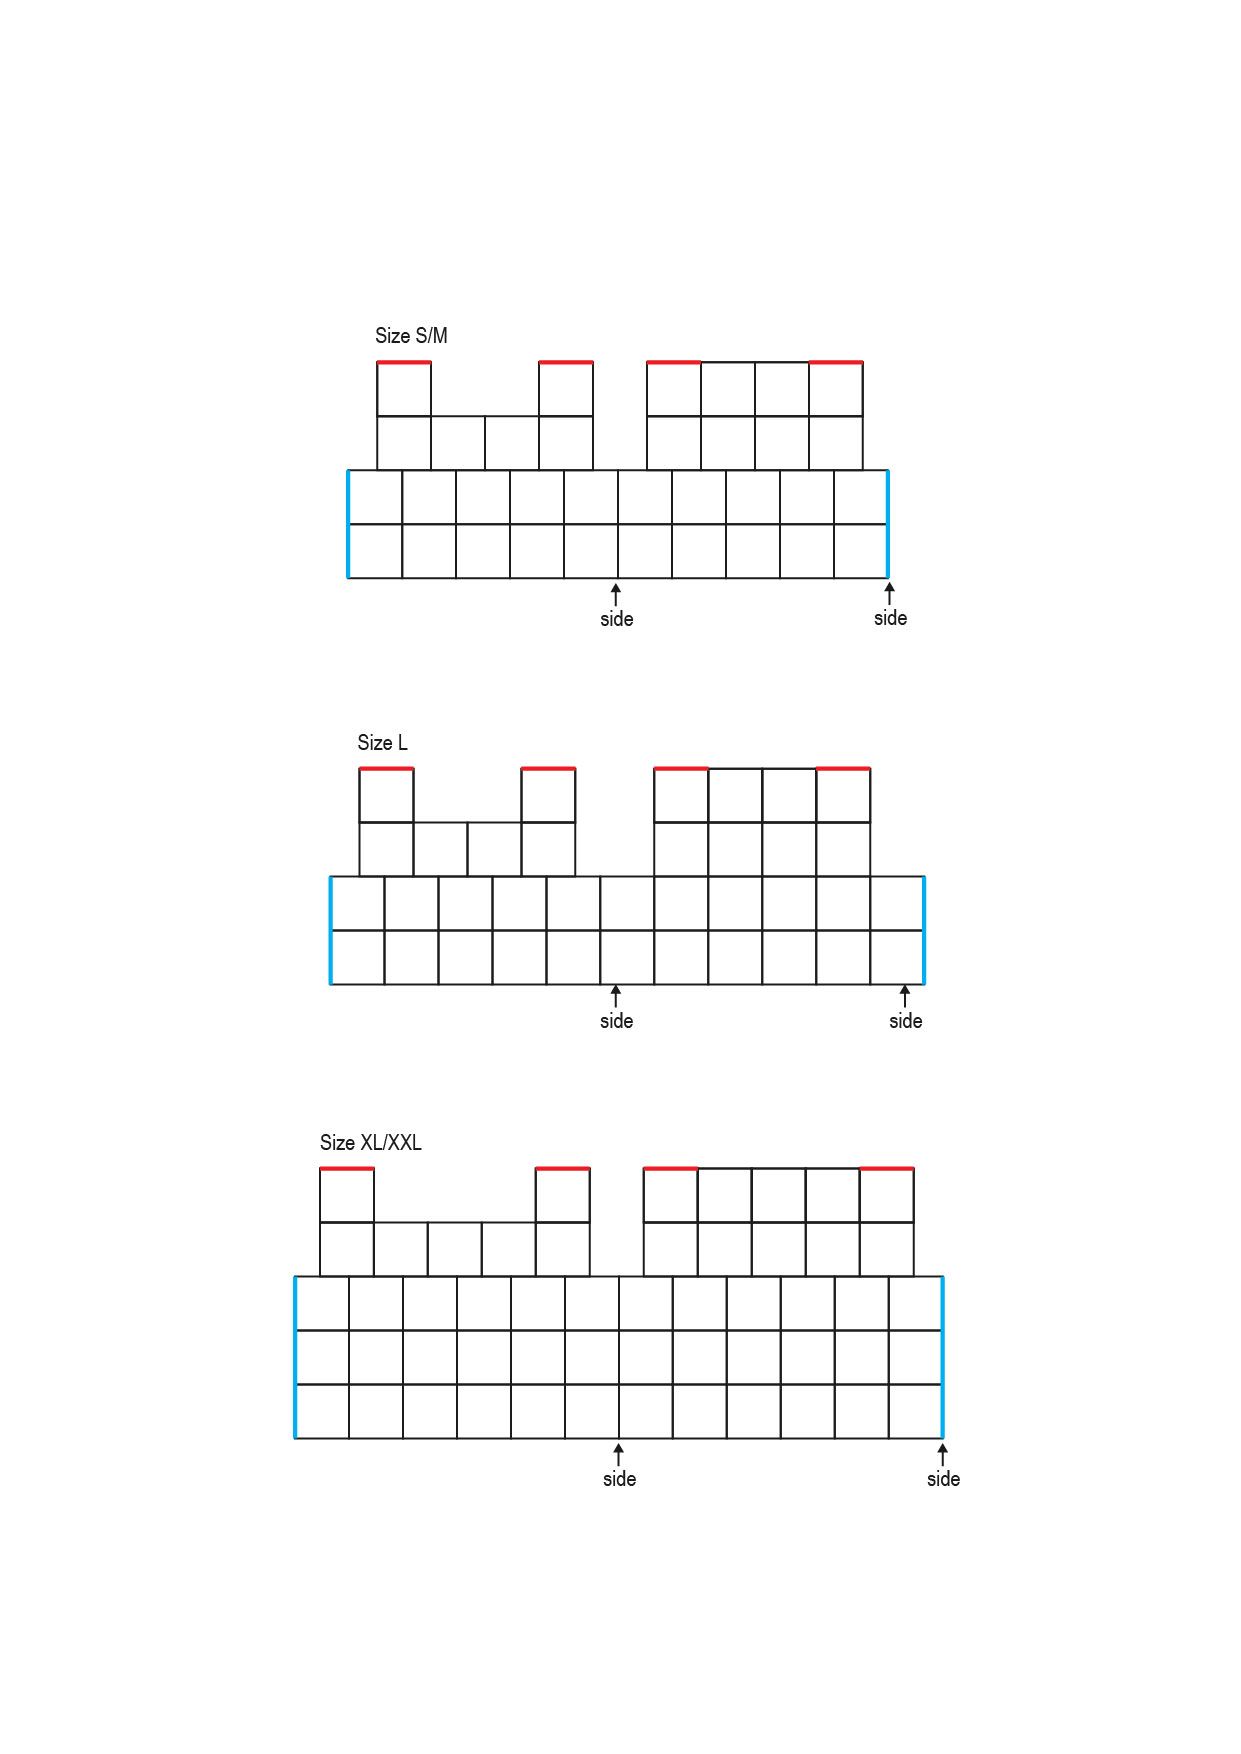
For the top, you can use any of the three granny squares: simple, flat flower of raised flower. Make a total of 34(36)53 whole squares.
The solid-color sample was crocheted with color 020 soprano. In the multicolor top, the granny squares were crocheted with the following order of colors: Round 1: (320) harmony, round 2: (546) encore, round 3: (748) scale, round 4: (020) soprano, round 5: (167) lento.
Assembly
Assemble the pieces according to the layout diagram. Sew the seams through the back loop using whipstitch. Sew the shoulder seams (shown in red in the diagram) and the side seam (shown in blue in the diagram).
Hem edge
The hem edge is worked flat in two parts, creating slits on the sides. Work the edging with the same color that you used for the last round of the squares.
Join yarn with sl st to side “seam” at hem.
Row 1 (RS): Ch3 (= 1st dc). Work approx. 15 dc along the side of each square and 1 dc at each seam between squares until the other side “seam”. You have approx. 81(89)97 dc. Turn work.
Rows 2–4: Ch3 (= 1st dc), 1 dc in each st.
Row 5: 1 sl st in each st. Cut yarn and fasten off.
Work the other side of hem edge in the same way.
Armhole edge
Work the edging with the same color that you used for the last round of the squares. Join yarn with sl st to centre of underarm.
Round 1: Ch3 (= 1st dc). Work approx. 15 dc along the side of each square and 1 dc at each seam between squares. At each corner, work 3 dc together. Join with sl st in 3rd ch from beg of round.
Round 2: Ch3 (= 1st dc), 1 dc in each st and 3 dc together at each corner. Join with sl st in 3rd ch from beg of round.
In size L only repeat round 2.
All sizes: Work 1 sl st in each st. Cut yarn and fasten off.
Work the other armhole edge in the same way.
Neck edge
Work the edging with the same color that you used for the last round of the squares. Join yarn with sl st to center back of neck.
Round 1: Ch3 (= 1st dc). Work approx. 15 dc along the side of each square and 1 dc at each seam between squares. At each corner, work 3 dc together. Join with sl st in 3rd ch from beg of round.
Round 2: Ch3 (= 1st dc), 1 dc in each st and 3 dc together at each corner. Join with sl st in 3rd ch from beg of round.
In size XL/XXL only repeat round 2.
All sizes: Work 1 sl st in each st. Cut yarn and fasten off.
Finishing
Weave in ends. Pin the top to measurements on a flat surface, wrong side up. Lightly steam or spray with water and let dry.
Pouta Granny Square Top
Size(s)
S/M(L)XL/XXL Sample garment size S/M (solid-color top) and XL/XXL (multicolor top)
Finished dimensions
bust circumference 100(110)120 cm / 40(44)48”
length at center back approx. 44(44)54 cm / 17.5(17.5)21.5” + neck edge 2(2)3 cm / 0.75(0.75)1.25”
Yarn demand
Novita Sointu Flat flower granny square top (solid-color): (020) soprano 400(450)650 g Simple granny square top (multicolor): (167) lento 150(150)200 g (020) soprano 80(80)110 g (748) scale 60(60)80 g (546) encore 40(50)60 g (320) harmony 30(30)40 g
Needles and other supplies
Crochet hook Novita 3.5 mm / US E-4 or size needed
Abbreviations and stitches used See instructions for the granny squares.
Gauge Granny square (whole piece) approx. 10 x 10 cm / 4 x 4”
Notes If you use different granny square designs in one project, you may need to use different hook size for different squares to ensure the pieces are the same size. Please note that yarn consumption varies depending on the yarn used and the granny square design chosen.
Granny squares
For the top, you can use any of the three granny squares: simple, flat flower of raised flower. Make a total of 34(36)53 whole squares.
The solid-color sample was crocheted with color 020 soprano. In the multicolor top, the granny squares were crocheted with the following order of colors: Round 1: (320) harmony, round 2: (546) encore, round 3: (748) scale, round 4: (020) soprano, round 5: (167) lento.
Assembly
Assemble the pieces according to the layout diagram. Sew the seams through the back loop using whipstitch. Sew the shoulder seams (shown in red in the diagram) and the side seam (shown in blue in the diagram).
Hem edge
The hem edge is worked flat in two parts, creating slits on the sides. Work the edging with the same color that you used for the last round of the squares.
Join yarn with sl st to side “seam” at hem.
Row 1 (RS): Ch3 (= 1st dc). Work approx. 15 dc along the side of each square and 1 dc at each seam between squares until the other side “seam”. You have approx. 81(89)97 dc. Turn work.
Rows 2–4: Ch3 (= 1st dc), 1 dc in each st.
Row 5: 1 sl st in each st. Cut yarn and fasten off.
Work the other side of hem edge in the same way.
Armhole edge
Work the edging with the same color that you used for the last round of the squares. Join yarn with sl st to centre of underarm.
Round 1: Ch3 (= 1st dc). Work approx. 15 dc along the side of each square and 1 dc at each seam between squares. At each corner, work 3 dc together. Join with sl st in 3rd ch from beg of round.
Round 2: Ch3 (= 1st dc), 1 dc in each st and 3 dc together at each corner. Join with sl st in 3rd ch from beg of round.
In size L only repeat round 2.
All sizes: Work 1 sl st in each st. Cut yarn and fasten off.
Work the other armhole edge in the same way.
Neck edge
Work the edging with the same color that you used for the last round of the squares. Join yarn with sl st to center back of neck.
Round 1: Ch3 (= 1st dc). Work approx. 15 dc along the side of each square and 1 dc at each seam between squares. At each corner, work 3 dc together. Join with sl st in 3rd ch from beg of round.
Round 2: Ch3 (= 1st dc), 1 dc in each st and 3 dc together at each corner. Join with sl st in 3rd ch from beg of round.
In size XL/XXL only repeat round 2.
All sizes: Work 1 sl st in each st. Cut yarn and fasten off.
Finishing
Weave in ends. Pin the top to measurements on a flat surface, wrong side up. Lightly steam or spray with water and let dry.