Socktober: Giraffe socks for adults Novita 7 Veljestä
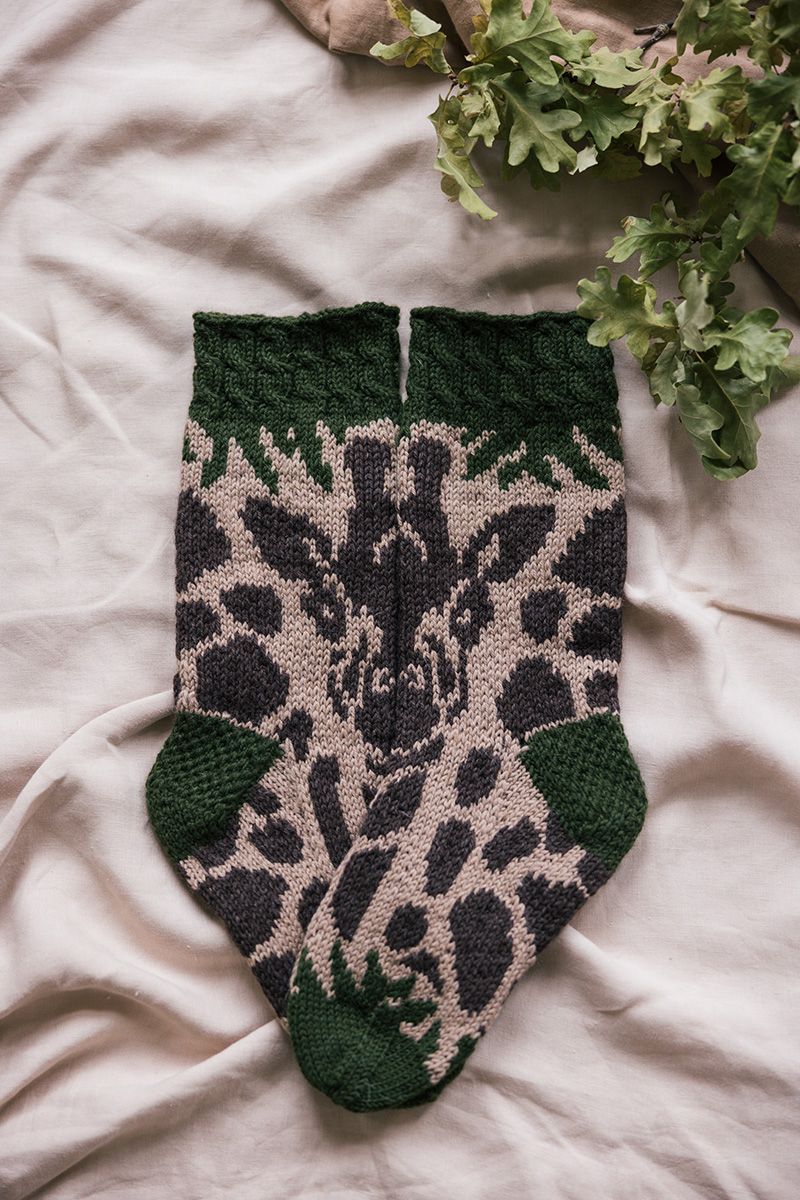
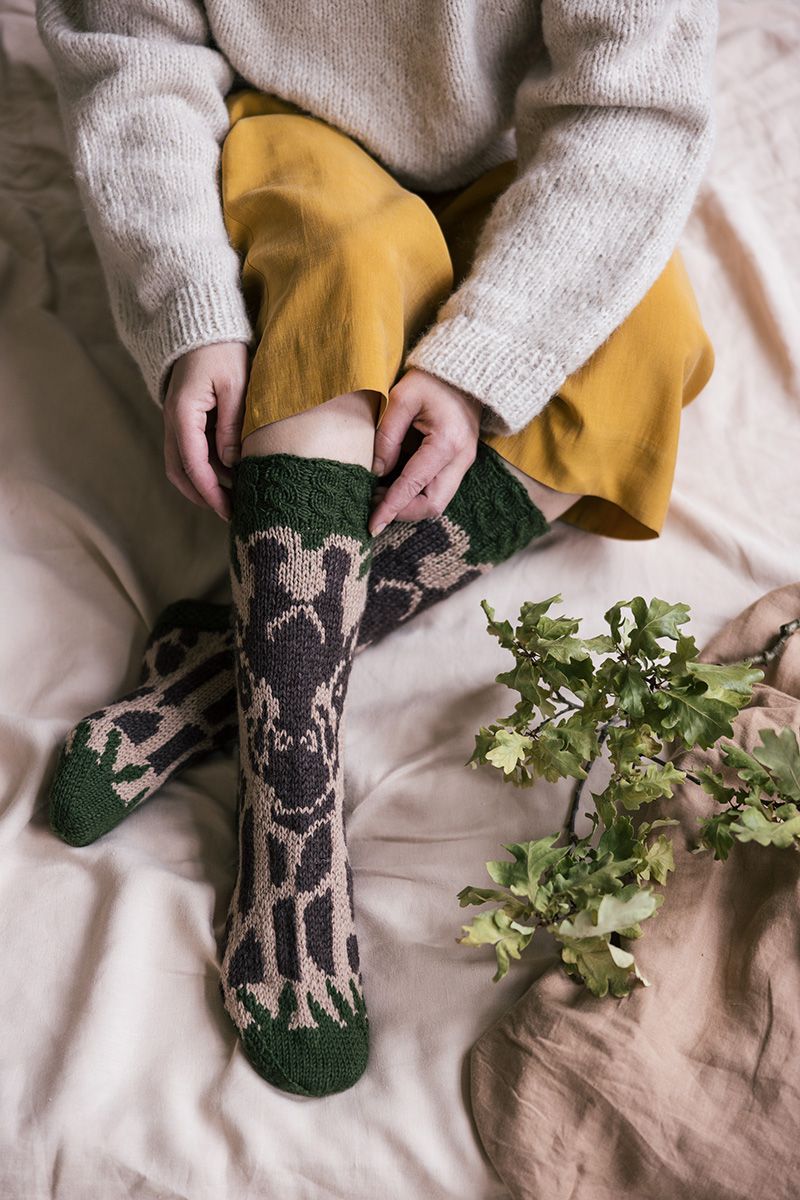
According to Lotta Lundin, also known by her designer name Knitting Lotta, what the knitting community needs is more fun patterns. These socks with a gorgeous giraffe pattern are definitely guaranteed to bring joy every time they are worn. This adult version of the socks is knitted using Novita 7 Veljestä yarn. Don’t forget to check out Lotta’s Novita Nalle giraffe pattern for children too.
Designer
Lotta Lundin
Size(s)
38/39
Yarn demand
Novita 7 Veljestä (391) Spruce Forest 80 g (618) Sandbank 80 g (064) False Morel 70 g
Needles and other supplies
Recommended needles Novita 3.5 mm double pointed or as required to meet gauge, cable needle and two stitch markers
Gauge swatch Cable rib stitch: as per pattern. Flat stocking stitch: knit right side (RS) and purl wrong side (WS). Colourwork: work all rows in stocking stitch as shown in chart and pattern instructions. Anchor your floating yarns by twisting them around your working yarn on the WS. It’s a good idea to vary where you anchor the floats.Pick up the contrasting colour from under the main colour for a neat and consistent finish.
Knitting tension 24 sts of colourwork = 10 cm
Leg
Cast on 60 sts using Spruce Forest and divide onto four needles, 15 sts each. Needle 1 marks the start of a new round. Join to work in the round and knit all sts on the first round tbl (through the back loop). Next, start the cable rib pattern.
Rounds 1 to 4: *k4, p1*, repeat *–* to end.
Round 5: *slip 2 sts onto a cable needle and hold at front, k2, k2 from cable needle, p1*, repeat *–* to end.
Rounds 6 to 11: *k4, p1*, repeat *–* to end.
Round 12: *slip 2 sts onto a cable needle and hold at front, k2, k2 from cable needle, p1*, repeat *–* to end.
Repeat Rounds 7–13 once, then work Rounds 1–2 one more time.
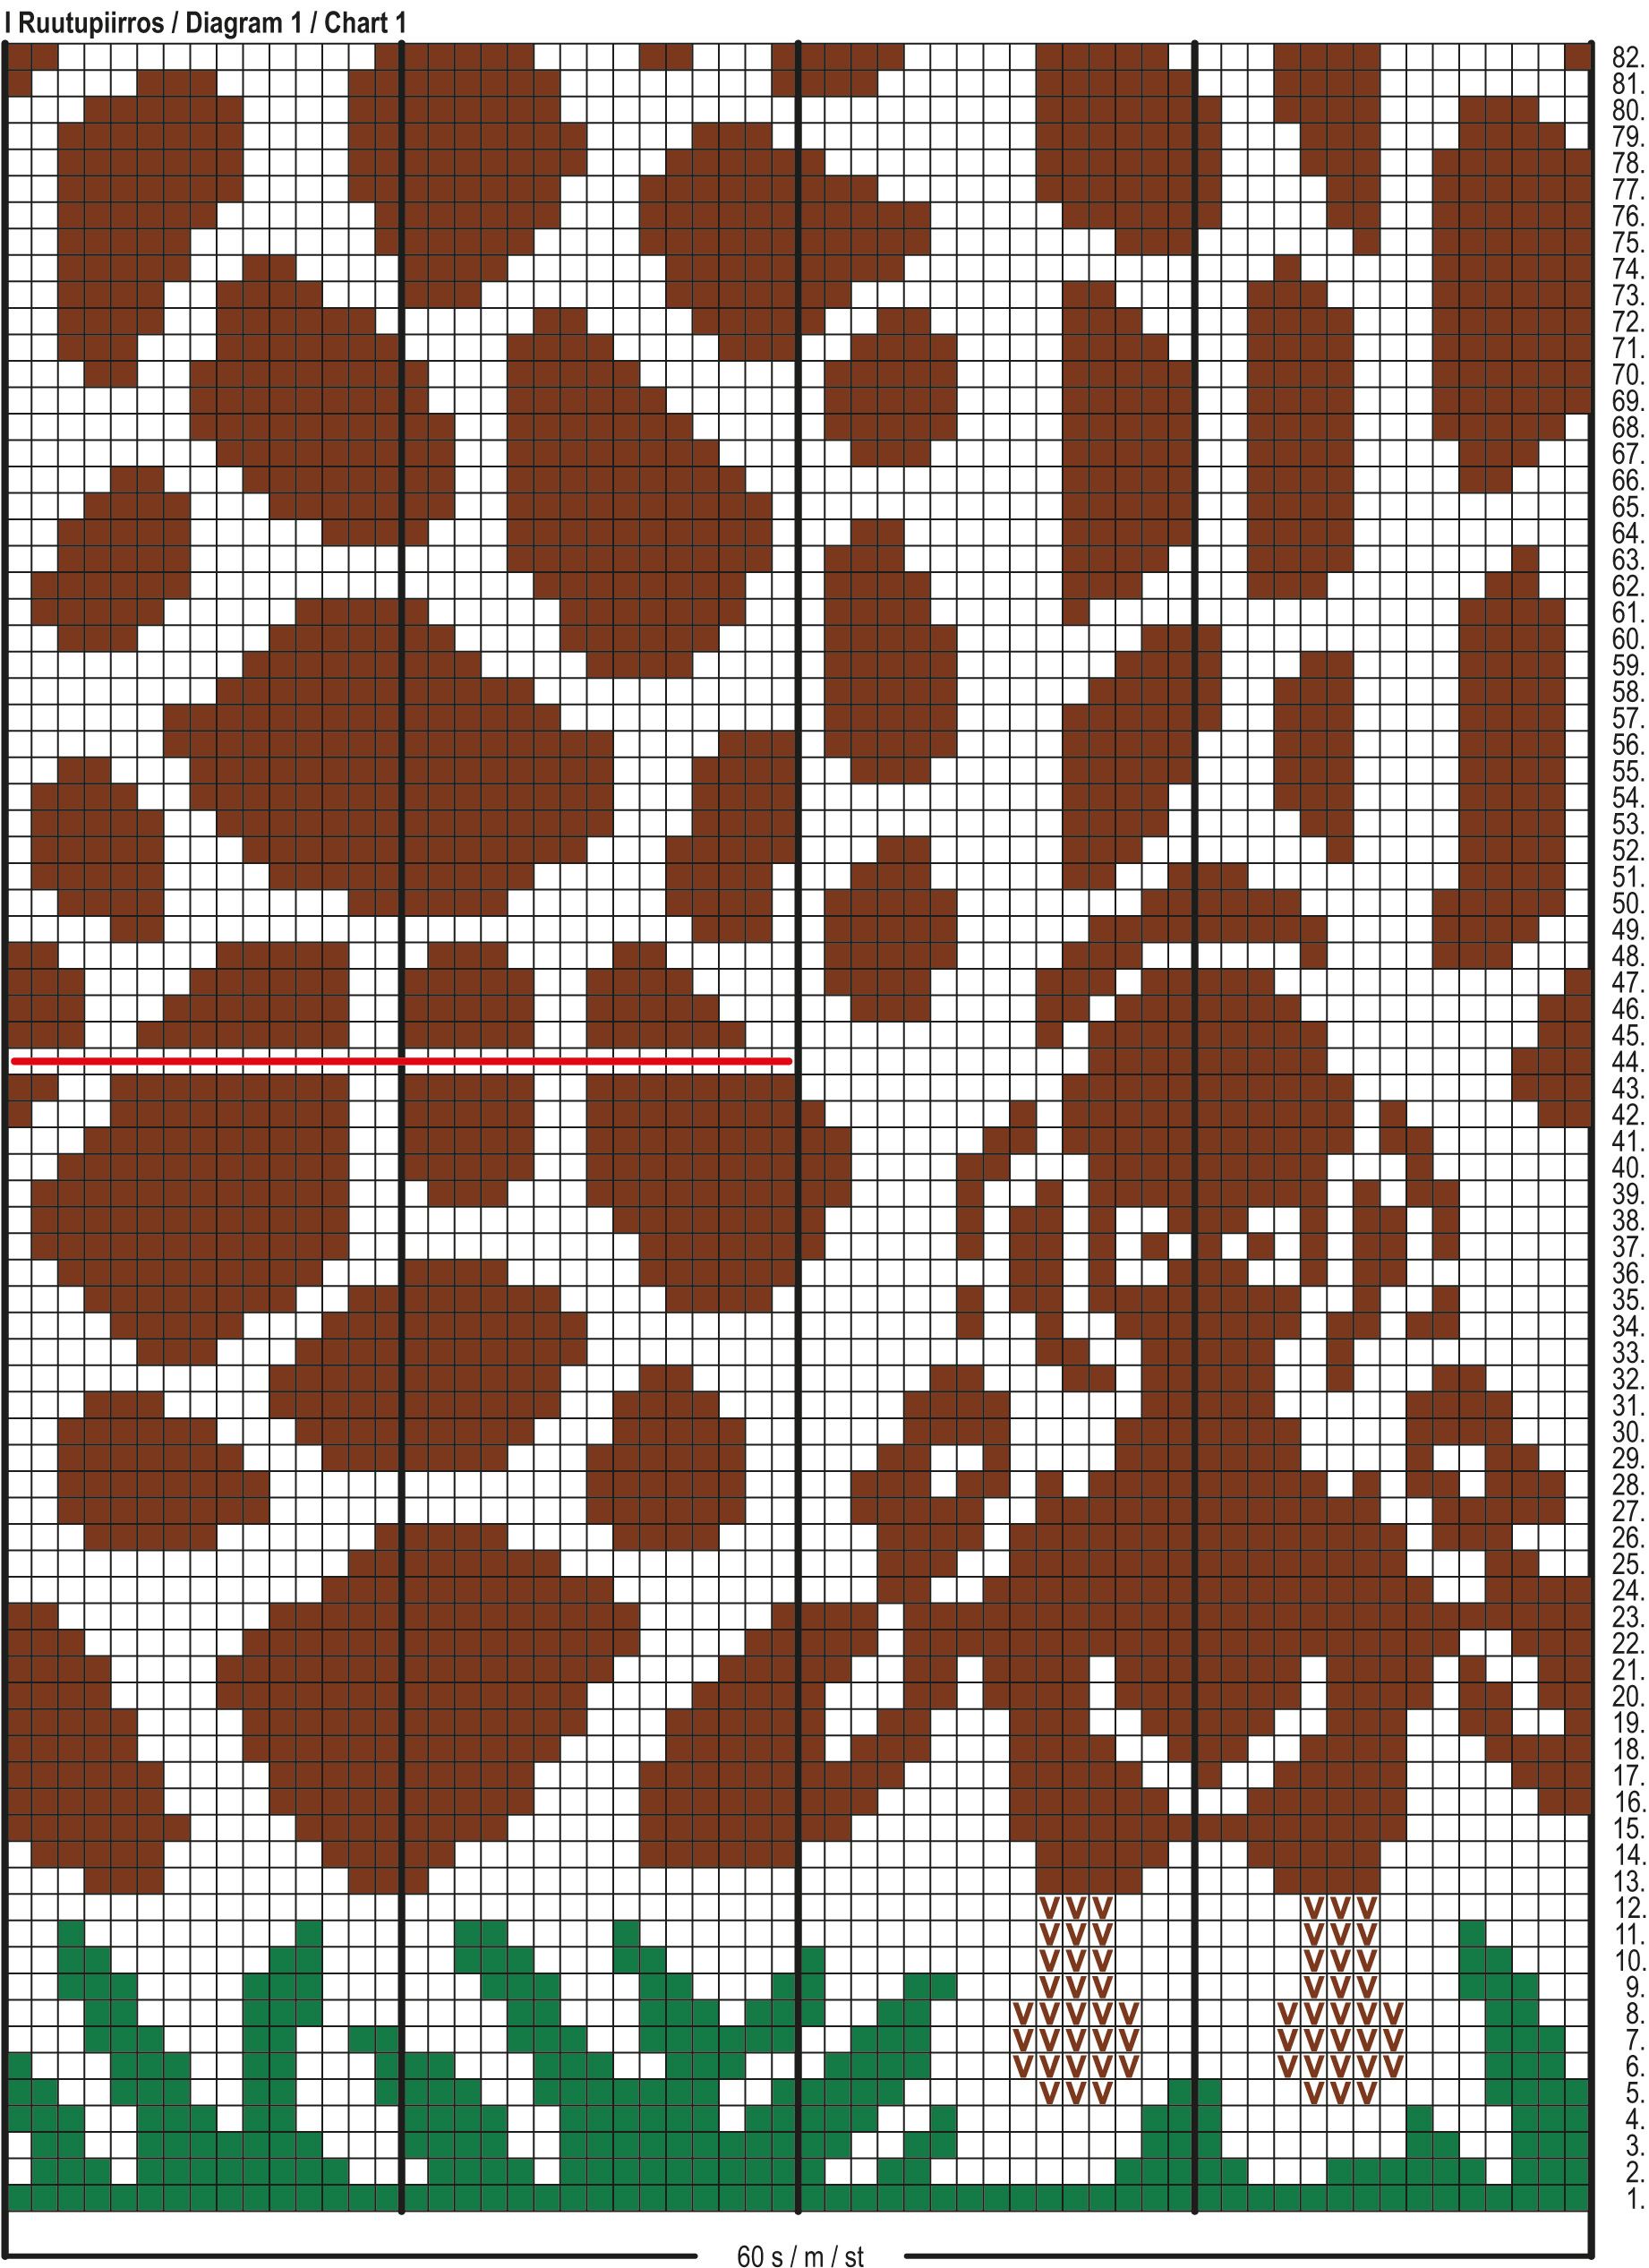
Start the colourwork from Row 1 of Chart I and work the 60-st repeat. Work chart rows 2–44. Important Carry the False Morel yarn across to the end of Needle 4. The last stitches you worked are marked with a red line. The leg should now measure approx. 25 cm.
Heel
Start the heel flap by knitting the sts on Needle 3 and Needle 4 (the sts marked in red you have just worked) onto a single needle = 30 sts. Leave the remaining sts for now. Work the heel using Spruce Forest. Turn your work, slip the first stitch purlwise (sl1pw) and purl the remaining stitches, decreasing 2 sts at regular intervals = 28 sts.
Eye of partridge heel flap:
Row 1 (RS): *slip one st with yarn in back (= sl1 wyib), k1*, repeat *–* to end. Turn your work.
Row 2 (WS): sl1 wyib, and purl remaining sts to end. Turn your work.
Row 3 (RS): sl1 wyib, k1, *k1, sl1 wyib*, repeat *–* until 2 sts remain, k2. Turn your work.
Row 4 (WS): sl1 wyib, and purl remaining sts to end. Turn your work.
Repeat Rows 1–4 a total of 6 times = 24 rows.
Work French heel decreases as follows:
Row 1 (RS): sl1wyib, work 15 sts in heel stitch, skp and k1. Turn your work.
Row 2 (WS): sl1pw, p5, p2tog, p1 and turn work.
Row 3 (RS): sl1, k6, skp (= sl1kw, k1 and pass slipped st over) and k1. Turn your work.
Row 4 (WS): sl1pw, p7, p2tog, p1. Turn your work.
Row 5 (RS): sl1, k8, skp and k1. Turn your work.
Continue the decreases as above, increasing the number of sts in the middle of your work by 1 sts on every row until the last decrease on both RS and WS is worked at the very edge of the heel flap. Please note that on the last two rows, there will be no sts left for the k1/p1. The last decrease is worked on the WS. Turn your work.
Divide the heel sts evenly between two needles, 8 sts on each. Break yarn.
Foot
Using the left needle (with 8 sts already on it), pick up 12 sts from the left side of the heel flap + 2 sts from between the heel flap and Needle 1 = 22 sts. Using the other needle with 8 sts already on it, pick up 12 sts from the right side of the heel flap + 2 sts from between the heel flap and Needle 2 = 22 sts. Place two stitch markers here for the gusset decreases as follows: count 7 sts from the start of Needle 3 (right side) and place the marker on this needle. Now count 7 sts from the end of your next needle (Needle 4) and place a marker on this needle. Both edges now have 7 sts each. Work these using Sandbank and make the gusset decreases here. Work the 30 heel sts in the middle as per chart.
Continue in pattern as per Row 45 of Chart 1. Resume from beginning of Needle 1, at left heel edge. Work sts on Needle 1 and Needle 2 first. Knit the picked up sts on Needle 3 and Needle 4 tbl and knit the 8 heel flap sts. Knit the 7 heel flap sts on Needle 3 using Sandbank and the remaining 15 according to chart. Knit the first 15 sts on Needle 4 according to chart and the 7 heel flap sts using your chosen technique.
Continue according to chart and start gusset decreases here: skp at the start of Needle 3 and k2tog at the end of Needle 4. Repeat these decreases on every other row until you have 60 sts, 15 sts on each needle. Remove the stitch markers before working the final decreases.
Continue in colourwork pattern until the foot measures 8 cm less than the full required length. This is Round 72 in the sample. Now knit 1 more round using Sandbank.
Work one more stranded colourwork stripe according to Chart 2, working rows 1–7.
Now start the toe decreases (wedge decreases): at the start of Needle 1 and Needle 3, k1 and skp, and at the end of Needle 2 and Needle 4 k2tog and k1.Decrease as above on every other row until 28 sts remain. Now work decreases on every row. When 8 sts remain, break yarn, thread the tail through the remaining stitches and finish off.
Repeat to make second sock.
Finishing
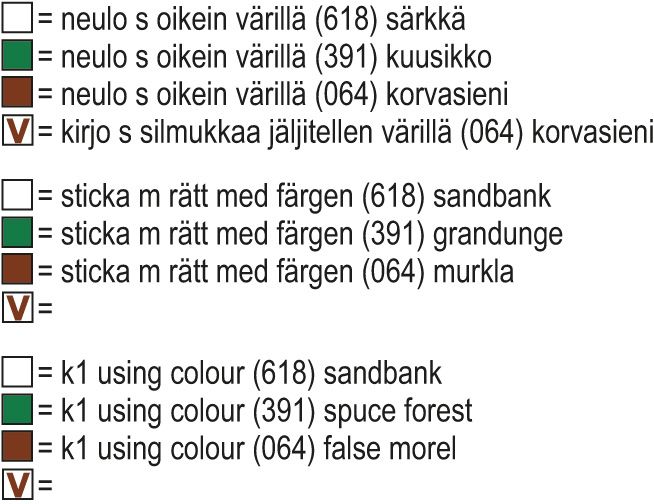
Using the duplicate stitch method, work the missing pattern in False Morel. Steam gently to finish.
Socktober: Giraffe socks for adults Novita 7 Veljestä
Size(s)
38/39
Yarn demand
Novita 7 Veljestä (391) Spruce Forest 80 g (618) Sandbank 80 g (064) False Morel 70 g
Needles and other supplies
Recommended needles Novita 3.5 mm double pointed or as required to meet gauge, cable needle and two stitch markers
Gauge swatch Cable rib stitch: as per pattern. Flat stocking stitch: knit right side (RS) and purl wrong side (WS). Colourwork: work all rows in stocking stitch as shown in chart and pattern instructions. Anchor your floating yarns by twisting them around your working yarn on the WS. It’s a good idea to vary where you anchor the floats.Pick up the contrasting colour from under the main colour for a neat and consistent finish.
Knitting tension 24 sts of colourwork = 10 cm
Leg
Cast on 60 sts using Spruce Forest and divide onto four needles, 15 sts each. Needle 1 marks the start of a new round. Join to work in the round and knit all sts on the first round tbl (through the back loop). Next, start the cable rib pattern.
Rounds 1 to 4: *k4, p1*, repeat *–* to end.
Round 5: *slip 2 sts onto a cable needle and hold at front, k2, k2 from cable needle, p1*, repeat *–* to end.
Rounds 6 to 11: *k4, p1*, repeat *–* to end.
Round 12: *slip 2 sts onto a cable needle and hold at front, k2, k2 from cable needle, p1*, repeat *–* to end.
Repeat Rounds 7–13 once, then work Rounds 1–2 one more time.
Start the colourwork from Row 1 of Chart I and work the 60-st repeat. Work chart rows 2–44. Important Carry the False Morel yarn across to the end of Needle 4. The last stitches you worked are marked with a red line. The leg should now measure approx. 25 cm.
Heel
Start the heel flap by knitting the sts on Needle 3 and Needle 4 (the sts marked in red you have just worked) onto a single needle = 30 sts. Leave the remaining sts for now. Work the heel using Spruce Forest. Turn your work, slip the first stitch purlwise (sl1pw) and purl the remaining stitches, decreasing 2 sts at regular intervals = 28 sts.
Eye of partridge heel flap:
Row 1 (RS): *slip one st with yarn in back (= sl1 wyib), k1*, repeat *–* to end. Turn your work.
Row 2 (WS): sl1 wyib, and purl remaining sts to end. Turn your work.
Row 3 (RS): sl1 wyib, k1, *k1, sl1 wyib*, repeat *–* until 2 sts remain, k2. Turn your work.
Row 4 (WS): sl1 wyib, and purl remaining sts to end. Turn your work.
Repeat Rows 1–4 a total of 6 times = 24 rows.
Work French heel decreases as follows:
Row 1 (RS): sl1wyib, work 15 sts in heel stitch, skp and k1. Turn your work.
Row 2 (WS): sl1pw, p5, p2tog, p1 and turn work.
Row 3 (RS): sl1, k6, skp (= sl1kw, k1 and pass slipped st over) and k1. Turn your work.
Row 4 (WS): sl1pw, p7, p2tog, p1. Turn your work.
Row 5 (RS): sl1, k8, skp and k1. Turn your work.
Continue the decreases as above, increasing the number of sts in the middle of your work by 1 sts on every row until the last decrease on both RS and WS is worked at the very edge of the heel flap. Please note that on the last two rows, there will be no sts left for the k1/p1. The last decrease is worked on the WS. Turn your work.
Divide the heel sts evenly between two needles, 8 sts on each. Break yarn.
Foot
Using the left needle (with 8 sts already on it), pick up 12 sts from the left side of the heel flap + 2 sts from between the heel flap and Needle 1 = 22 sts. Using the other needle with 8 sts already on it, pick up 12 sts from the right side of the heel flap + 2 sts from between the heel flap and Needle 2 = 22 sts. Place two stitch markers here for the gusset decreases as follows: count 7 sts from the start of Needle 3 (right side) and place the marker on this needle. Now count 7 sts from the end of your next needle (Needle 4) and place a marker on this needle. Both edges now have 7 sts each. Work these using Sandbank and make the gusset decreases here. Work the 30 heel sts in the middle as per chart.
Continue in pattern as per Row 45 of Chart 1. Resume from beginning of Needle 1, at left heel edge. Work sts on Needle 1 and Needle 2 first. Knit the picked up sts on Needle 3 and Needle 4 tbl and knit the 8 heel flap sts. Knit the 7 heel flap sts on Needle 3 using Sandbank and the remaining 15 according to chart. Knit the first 15 sts on Needle 4 according to chart and the 7 heel flap sts using your chosen technique.
Continue according to chart and start gusset decreases here: skp at the start of Needle 3 and k2tog at the end of Needle 4. Repeat these decreases on every other row until you have 60 sts, 15 sts on each needle. Remove the stitch markers before working the final decreases.
Continue in colourwork pattern until the foot measures 8 cm less than the full required length. This is Round 72 in the sample. Now knit 1 more round using Sandbank.
Work one more stranded colourwork stripe according to Chart 2, working rows 1–7.
Now start the toe decreases (wedge decreases): at the start of Needle 1 and Needle 3, k1 and skp, and at the end of Needle 2 and Needle 4 k2tog and k1.Decrease as above on every other row until 28 sts remain. Now work decreases on every row. When 8 sts remain, break yarn, thread the tail through the remaining stitches and finish off.
Repeat to make second sock.
Finishing
Using the duplicate stitch method, work the missing pattern in False Morel. Steam gently to finish.
