Hooded Scarf Novita Alpaca Wool
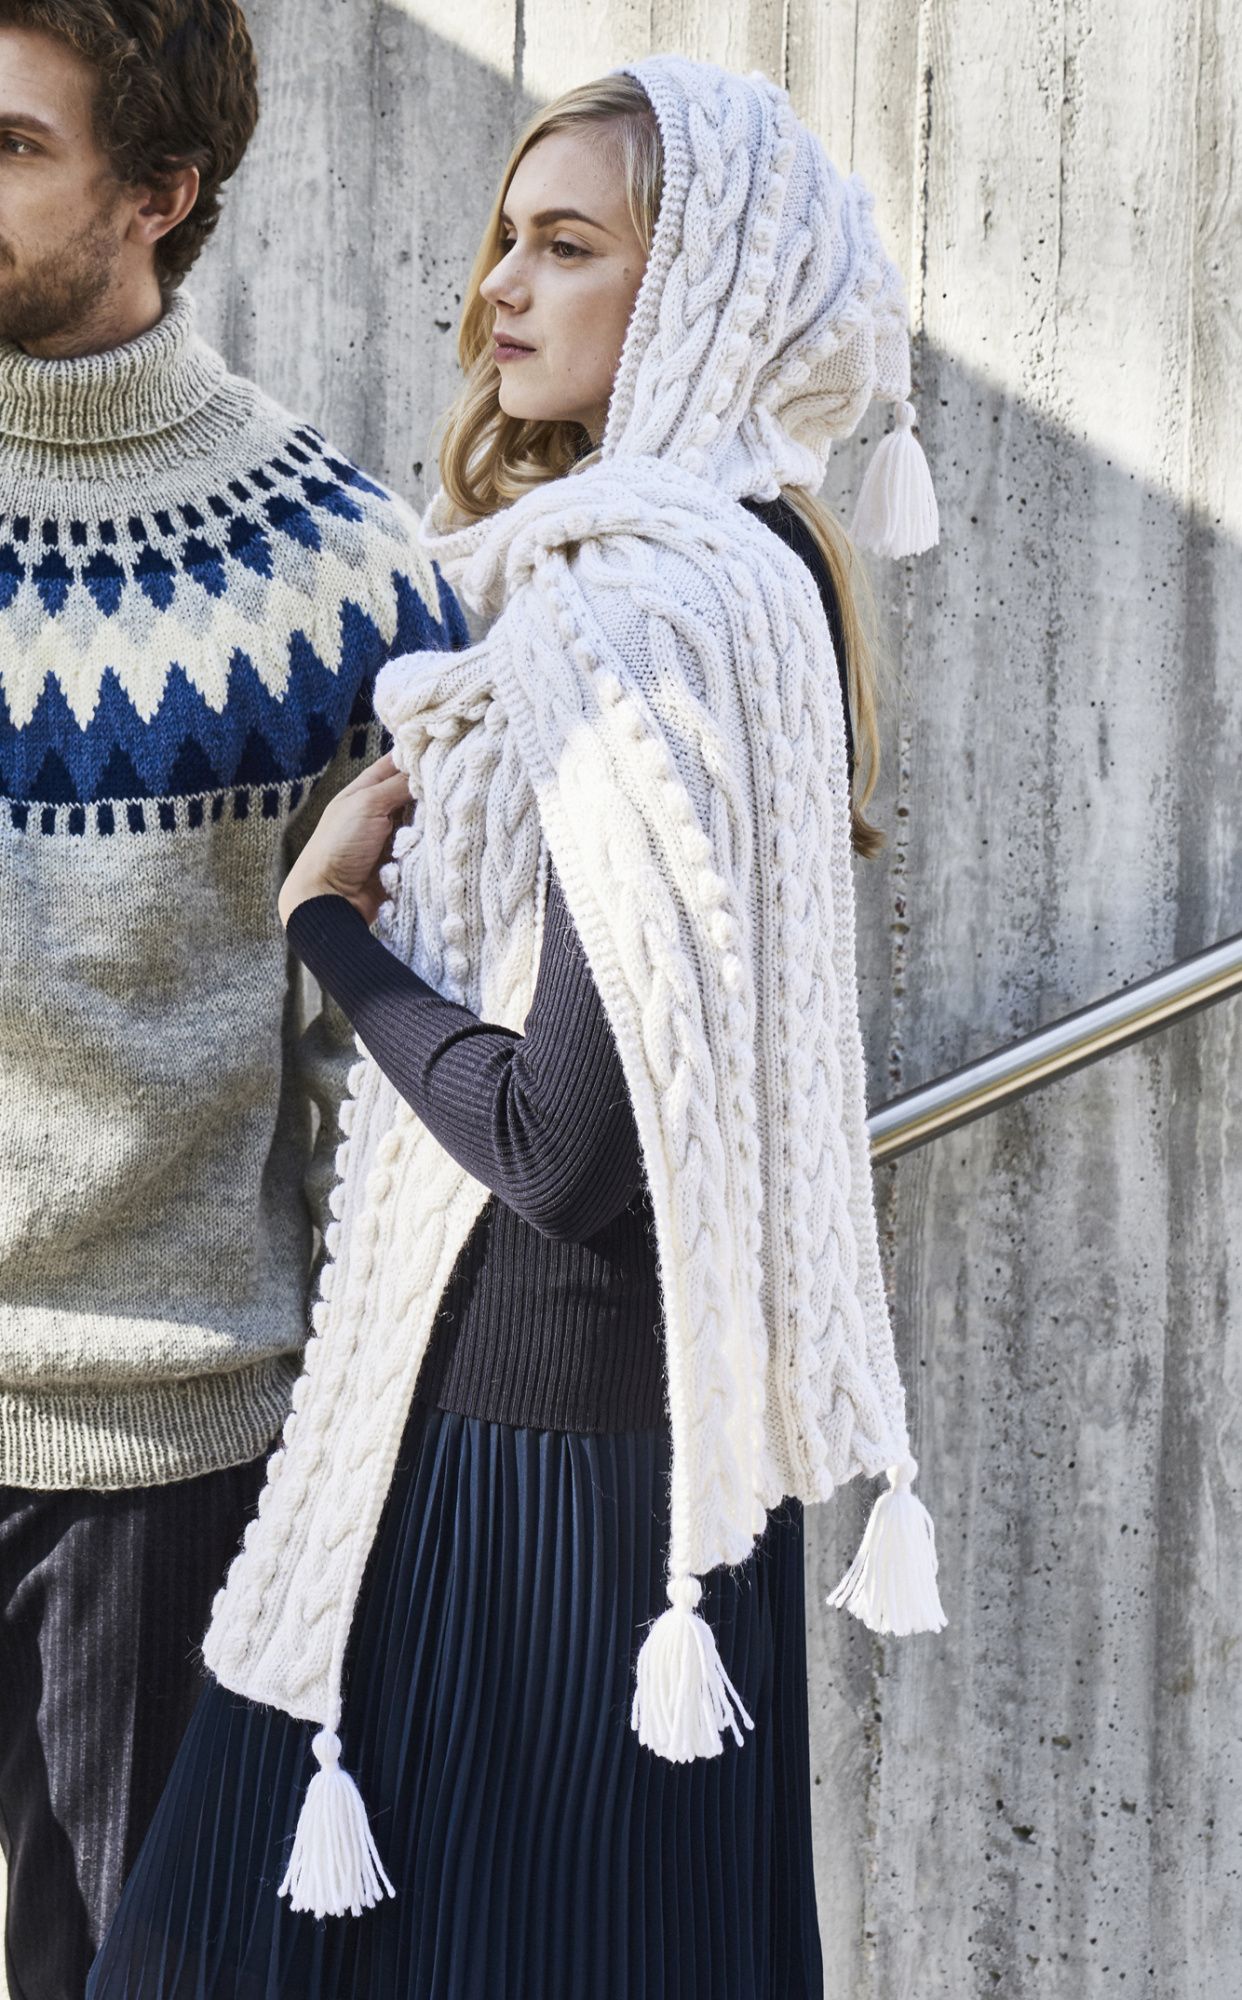
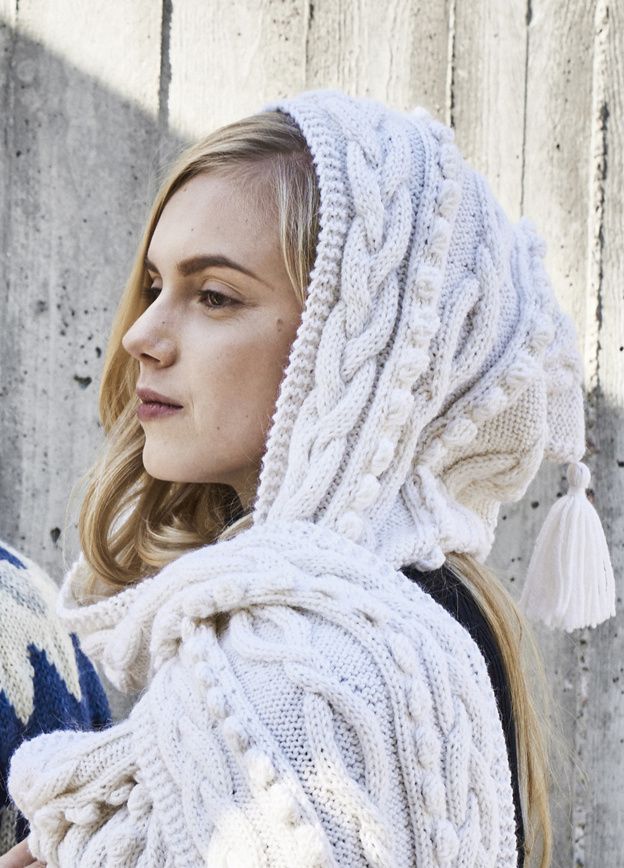
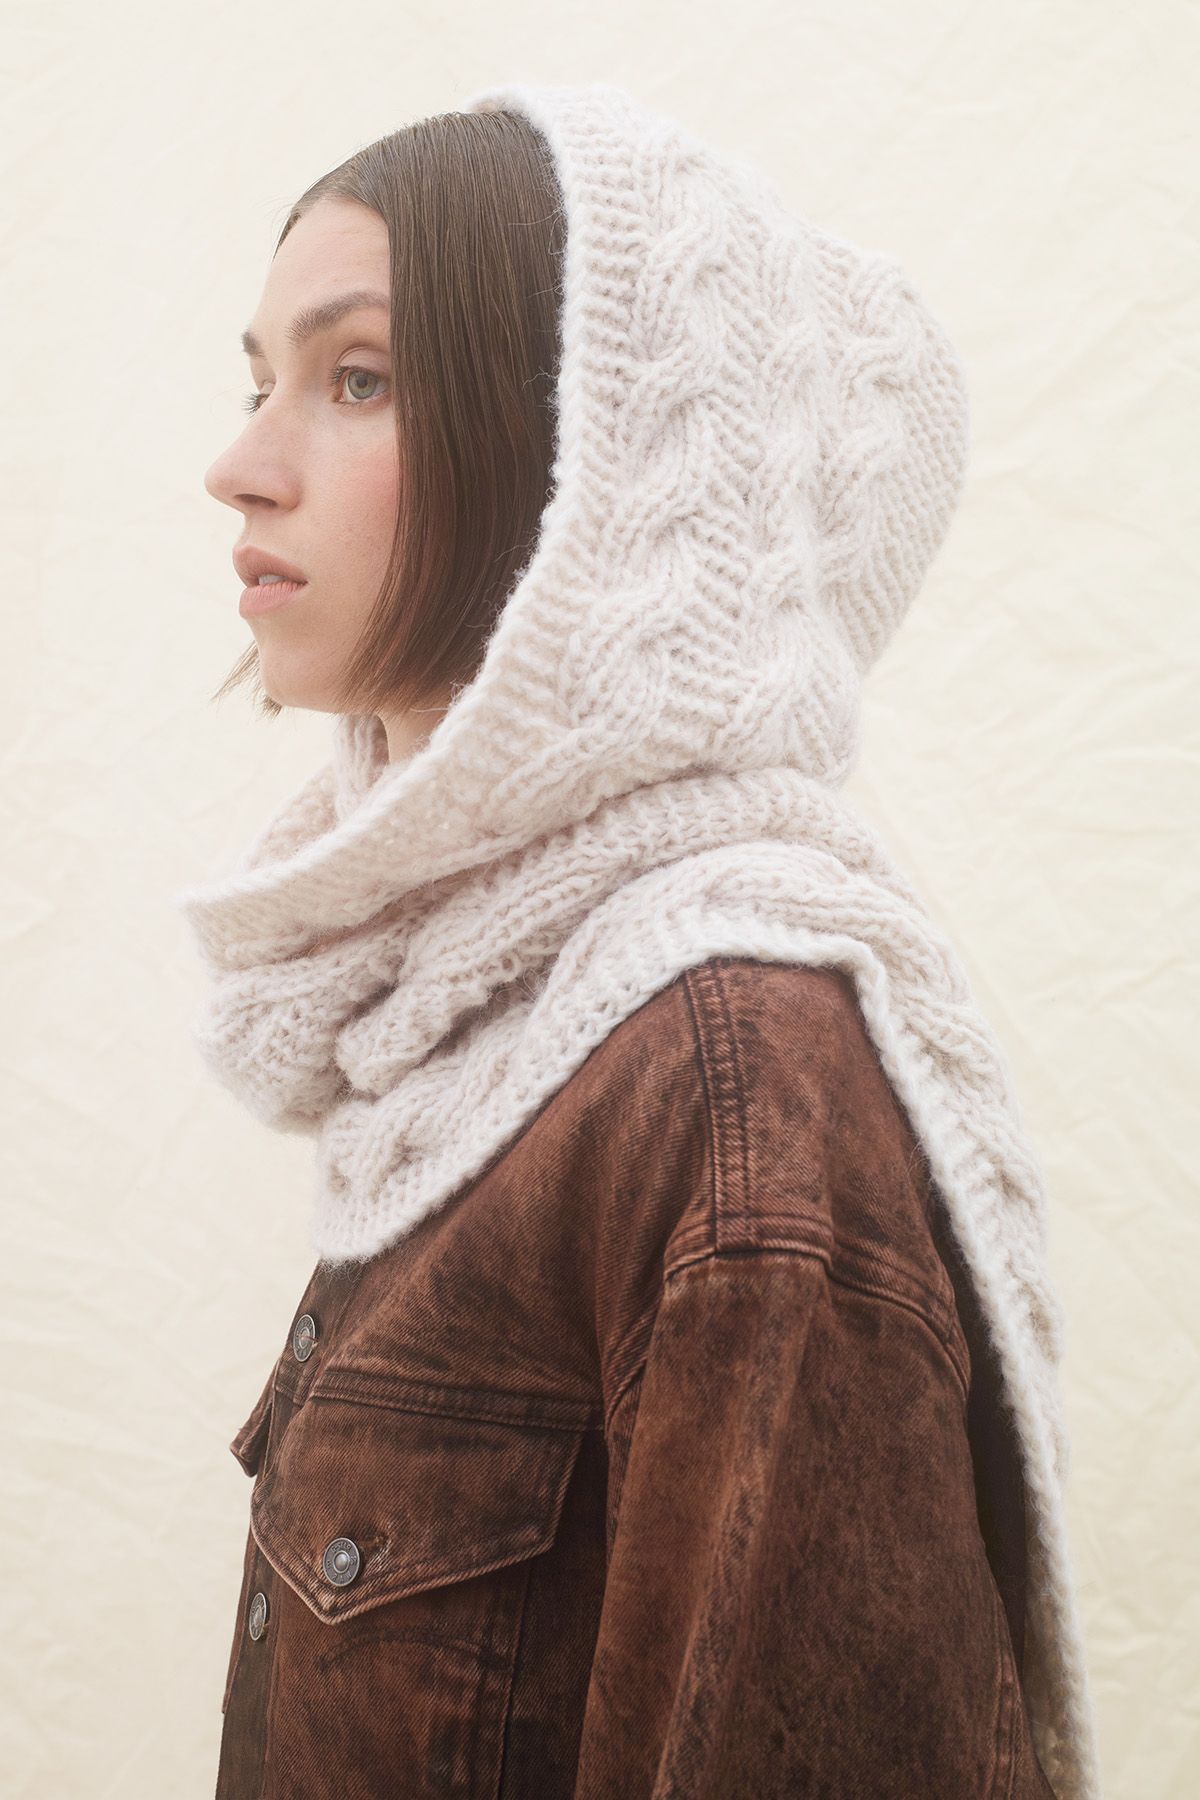
The hooded scarf with decorative cables is soft and warm, thanks to Novita Alpaca Wool yarn.
Designer
Lea Petäjä
Size(s)
1 Size
Finished dimensions
Length from one end of the scarf to the top of the hood about 116 cm, width of the scarf about 33 cm
Yarn demand
Novita Alpaca Wool off white 550 g
Needles and other supplies
Needles 1 Pair of knitting needles Novita 5.0 mm 1 x Cable needle
Finished dimensions
Length from one end of the scarf to the top of the hood about 116 cm, width of the scarf about 33 cm
Stitch patterns
Garter stitch
All rows: K to end.
Cable stitch pattern
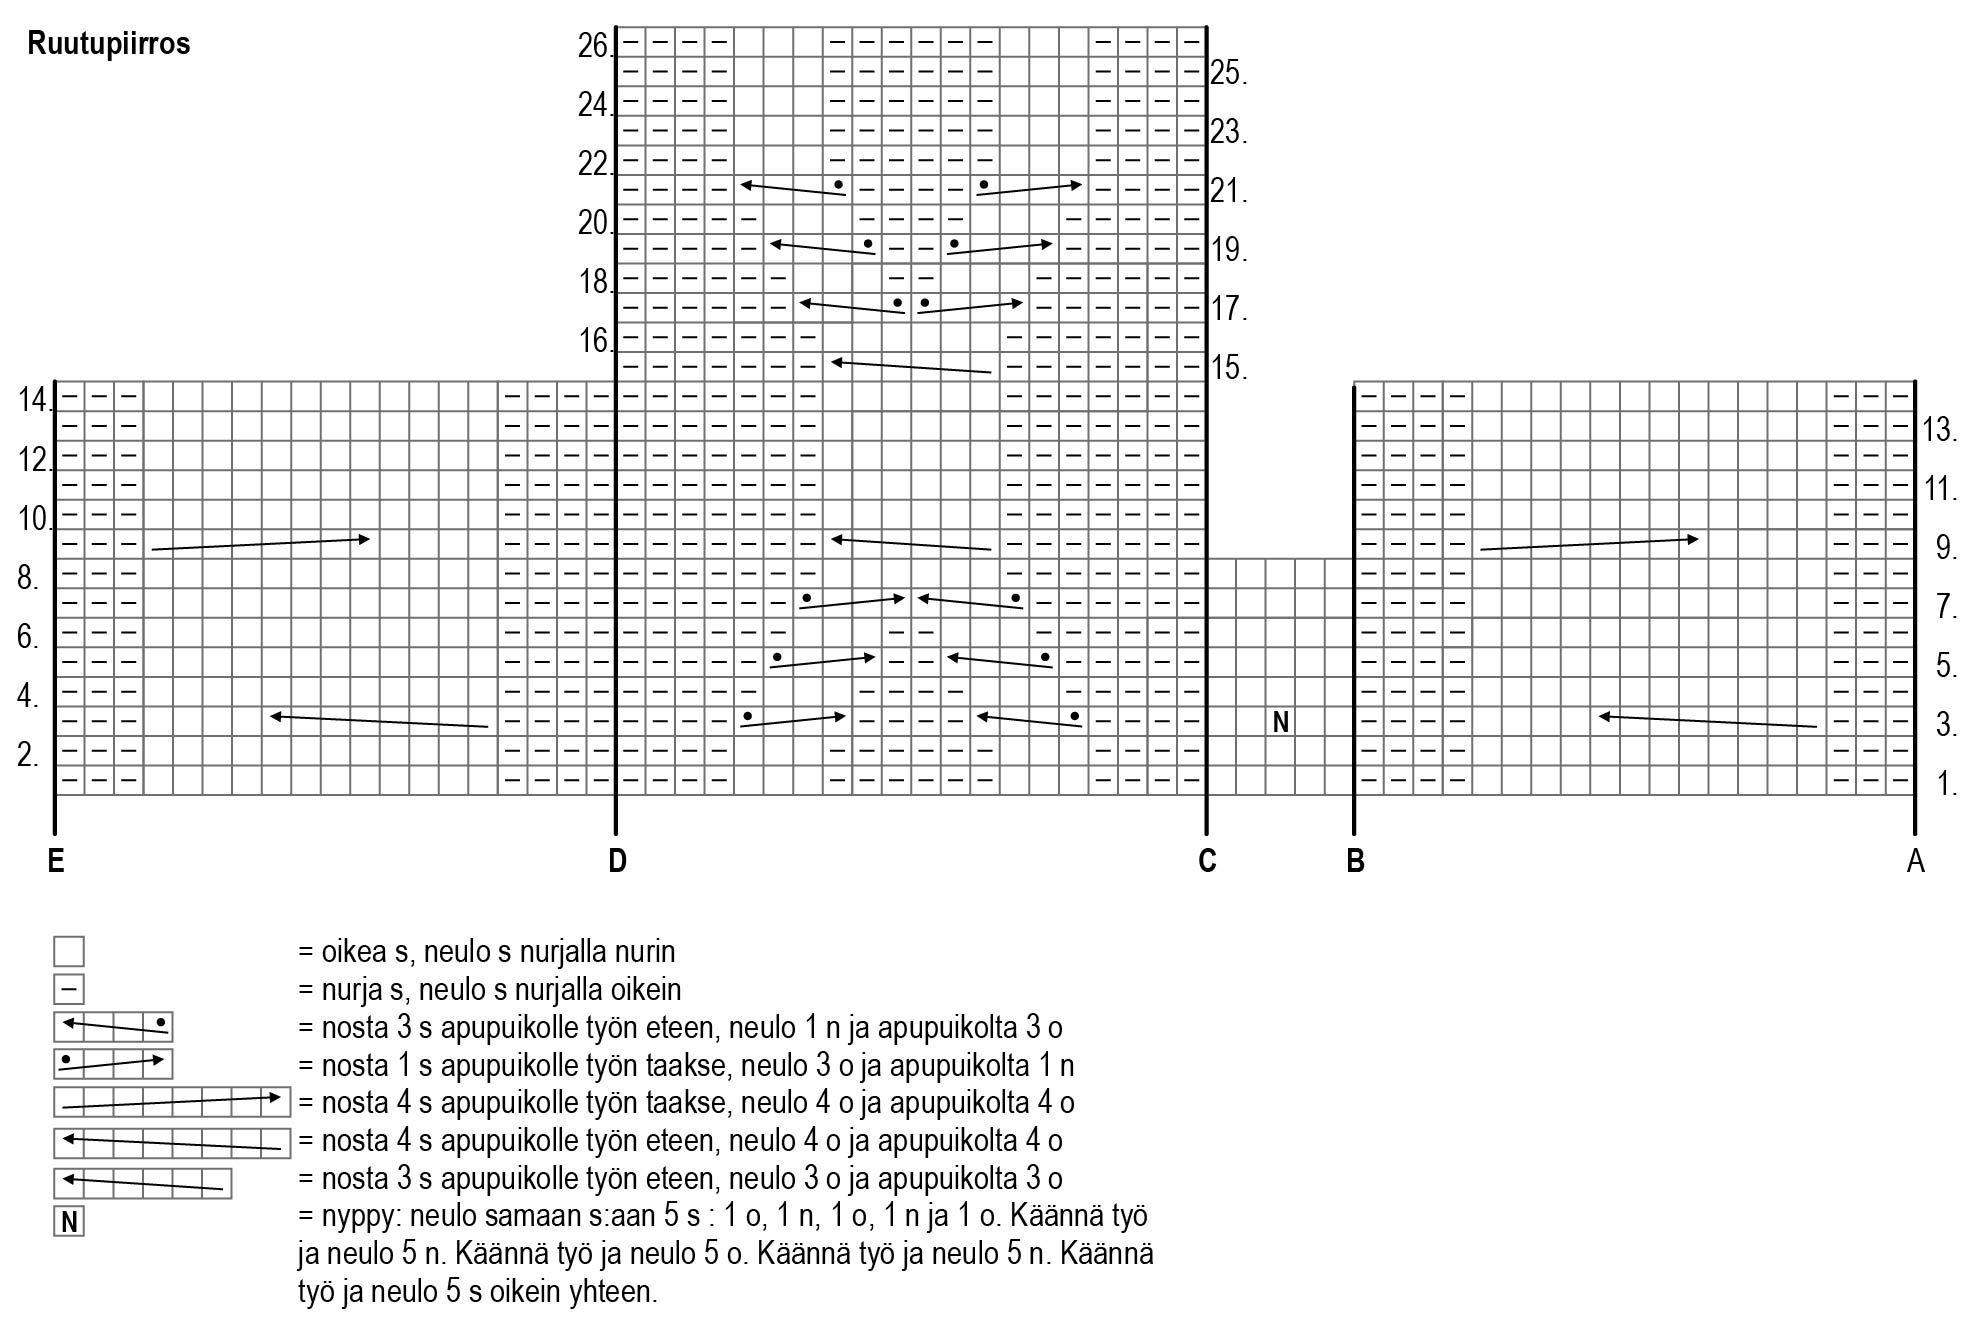
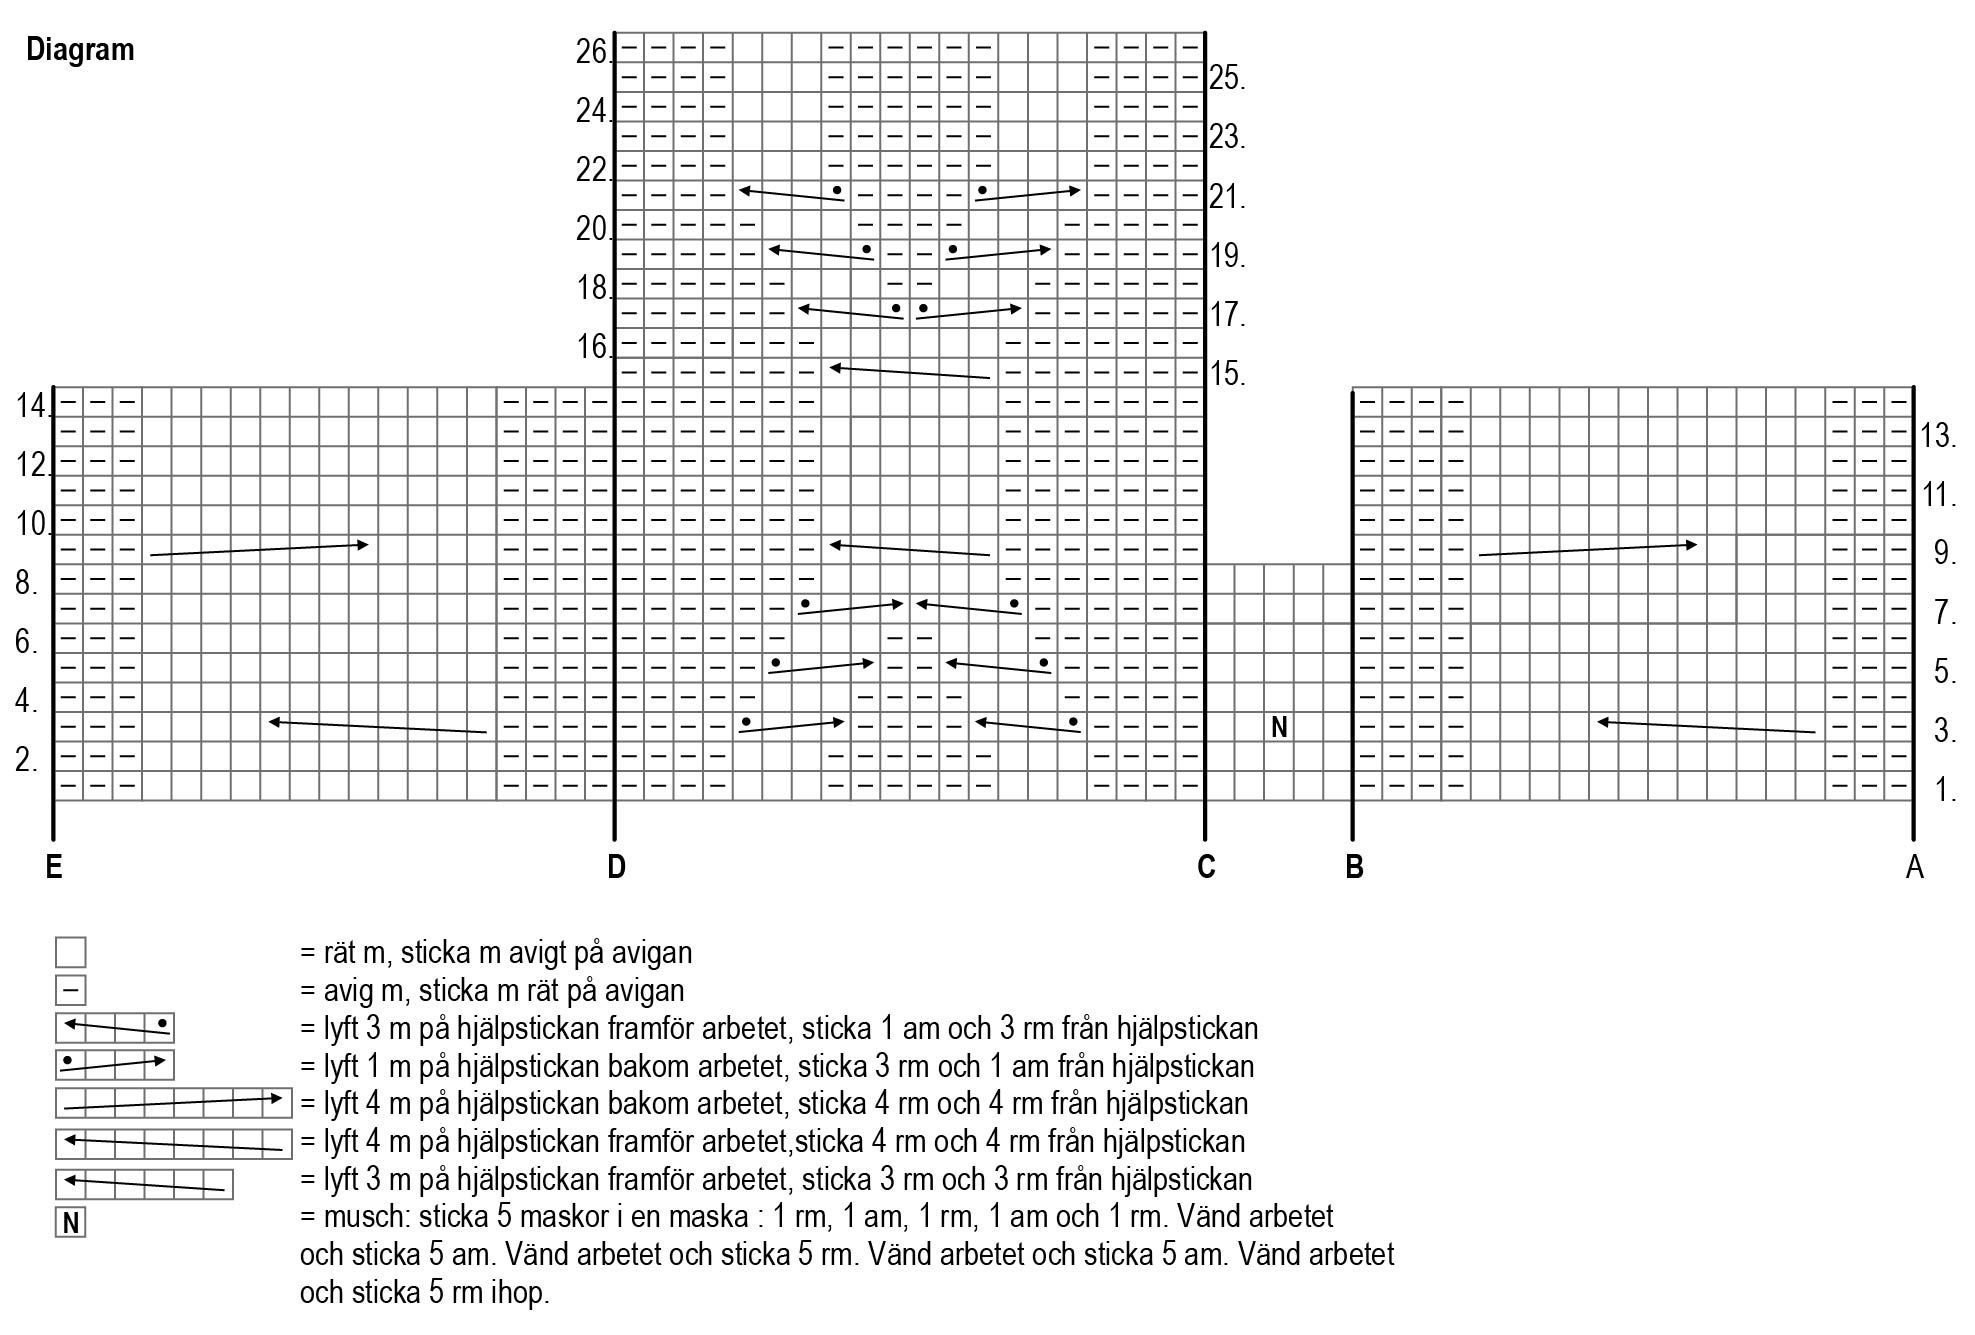
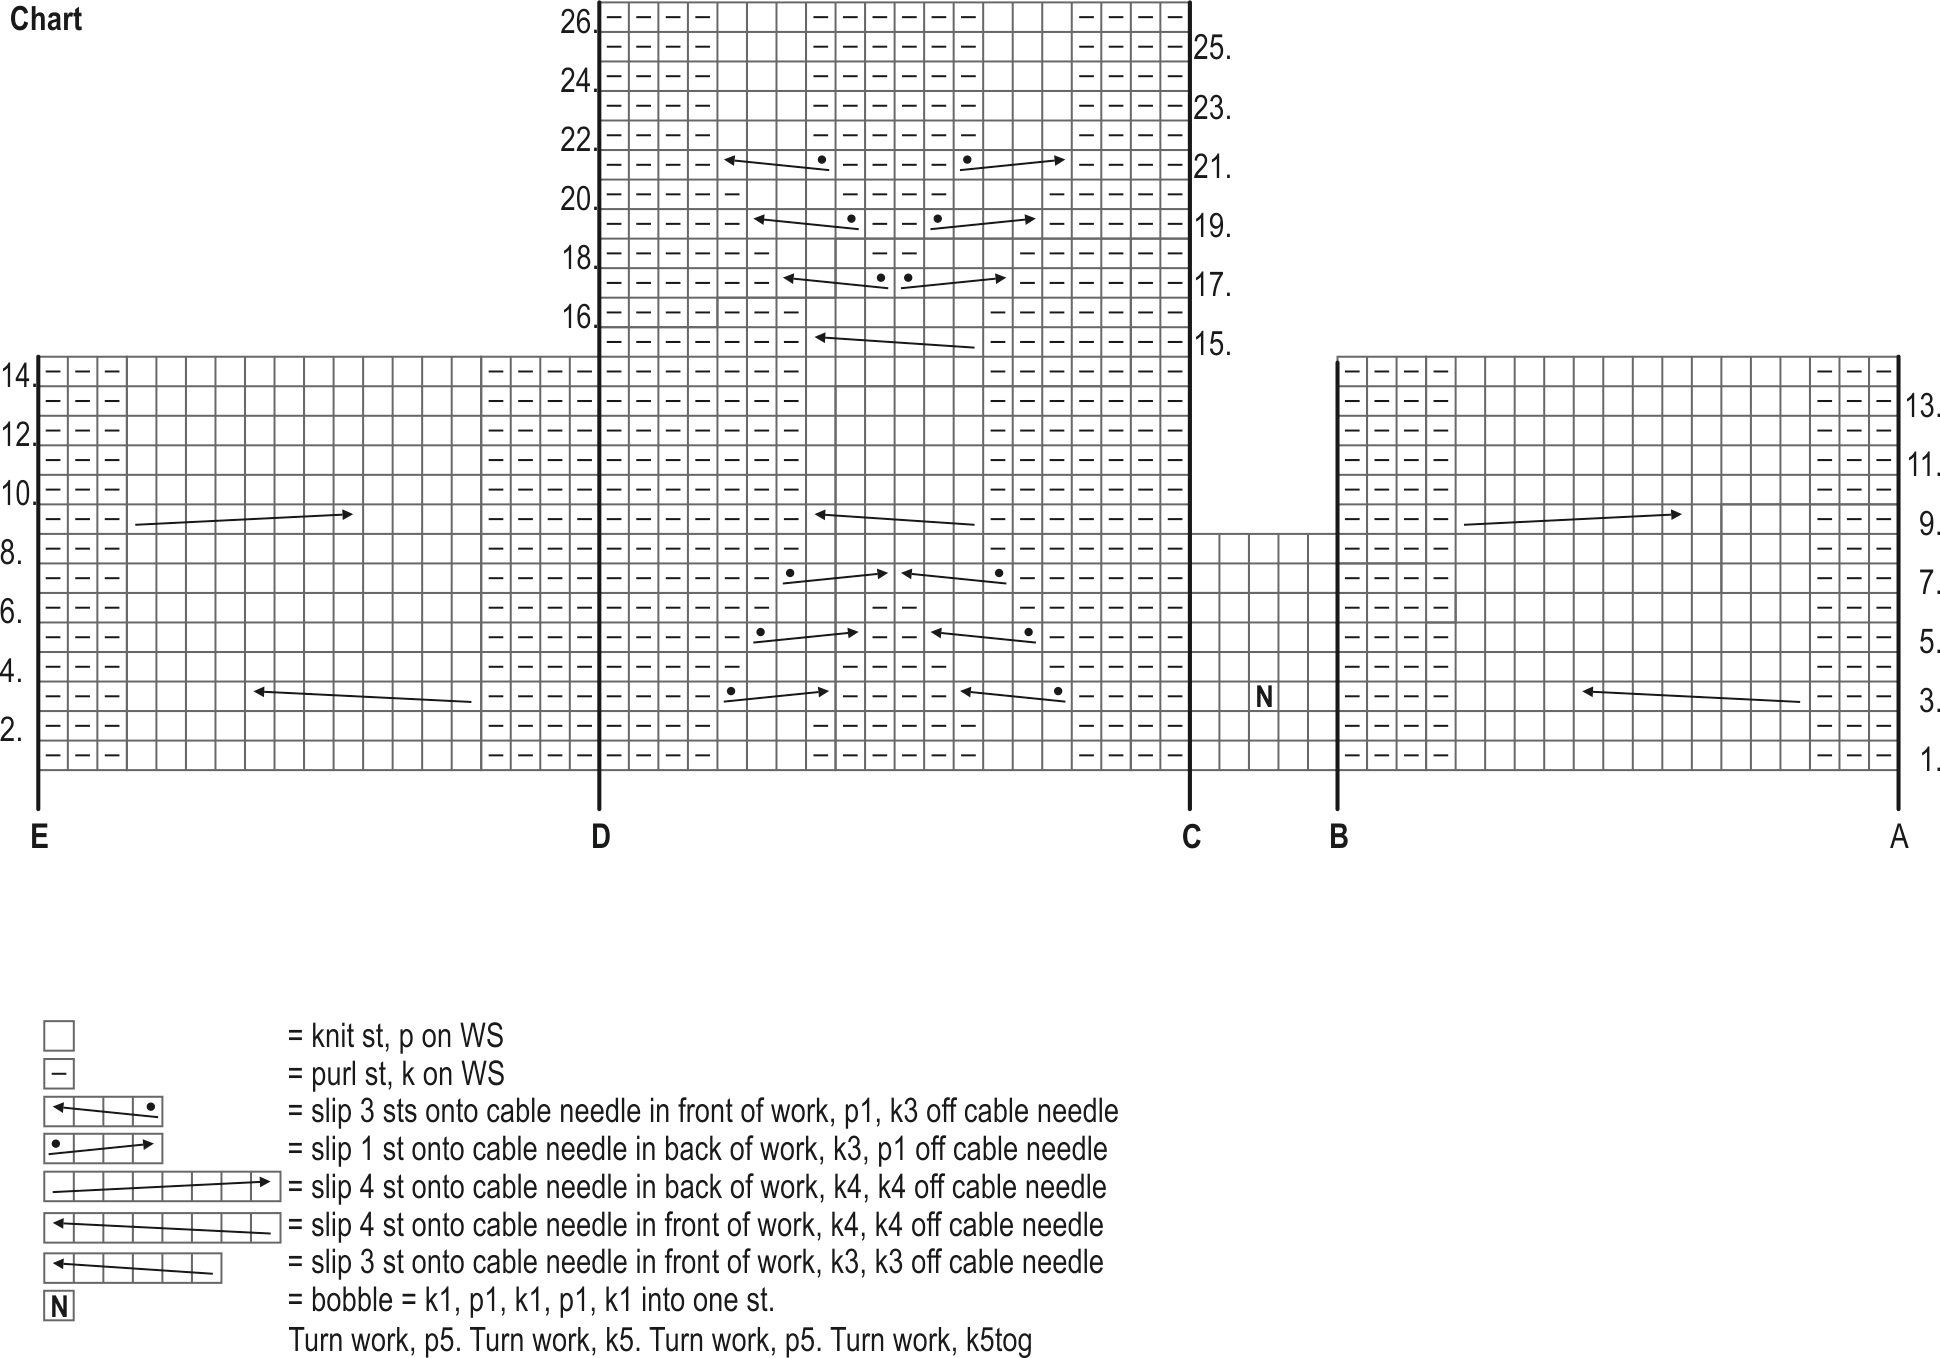
Follow the chart and written instructions.
Tension
Width of the scarf is 30 cm = 74 sts
Note! The hooded scarf is worked flat from one end to another.
Cast on 74 sts and start following the chart at row 1 in the following way: K3, work section A-D (= 44 sts), section B-C (= 5 sts), section D-E (= 19 sts), k3. Keep working the sections back and forth in this order and always working 3 edge sts in garter stitch at both ends of a row. Work row 2 and after that keep repeating rows 3-14 in sections A-B and D-E, rows 3-8 in section B-C and rows 3-26 in section C-D.
When the piece measures about 85 cm, start shaping the hood back by increasing in the following way:
Next row (RS): Work in pattern to section D-E, p3, M1L purlwise, work 12 sts in pattern (cable), M1L purlwise, work to end in pattern.
Repeat these increases every 2 cm for 3 times more. Always work the increased sts in reverse stocking stitch. Insert a stitch marker at the row of the the last increases. You have now 82 sts on the needle.
Continue straight. When the scarf measures about 116 cm and you have just worked row 24 in the section C-D, you have reached the midpoint of the work (= the top of the hood portion). Insert a stitch marker at this row.
Work straight until the second half of the hood reaches the last increases of the first half marked with a stitch marker. Now, start decreasing in the following way:
Next row (RS): Work in pattern to section D-E, p3, p2tog, work 12 sts in pattern (cable), p2tog, work to end in pattern.
Repeat these decreases every 2 cm for 3 times more on both sides of the cable, ie. at the points matching the increases on the other half. You have now 74 sts on the needles.
When the second half measures 116 cm and you have just worked row 24 in the section C-D, cast off all sts.
Finishing
Steam block the scarf gently.
Fold the piece in half along the top of the hood. Join the hood closed starting at the top of the hood and working 35 cm down along the back edge.
Make 5 tassels and attach one at the tip of the hood and the rest at the corners of the scarf.
Hooded Scarf Novita Alpaca Wool
Size(s)
1 Size
Finished dimensions
Length from one end of the scarf to the top of the hood about 116 cm, width of the scarf about 33 cm
Yarn demand
Novita Alpaca Wool off white 550 g
Needles and other supplies
Needles 1 Pair of knitting needles Novita 5.0 mm 1 x Cable needle
Stitch patterns
Garter stitch
All rows: K to end.
Cable stitch pattern
Follow the chart and written instructions.
Tension
Width of the scarf is 30 cm = 74 sts
Note! The hooded scarf is worked flat from one end to another.
Cast on 74 sts and start following the chart at row 1 in the following way: K3, work section A-D (= 44 sts), section B-C (= 5 sts), section D-E (= 19 sts), k3. Keep working the sections back and forth in this order and always working 3 edge sts in garter stitch at both ends of a row. Work row 2 and after that keep repeating rows 3-14 in sections A-B and D-E, rows 3-8 in section B-C and rows 3-26 in section C-D.
When the piece measures about 85 cm, start shaping the hood back by increasing in the following way:
Next row (RS): Work in pattern to section D-E, p3, M1L purlwise, work 12 sts in pattern (cable), M1L purlwise, work to end in pattern.
Repeat these increases every 2 cm for 3 times more. Always work the increased sts in reverse stocking stitch. Insert a stitch marker at the row of the the last increases. You have now 82 sts on the needle.
Continue straight. When the scarf measures about 116 cm and you have just worked row 24 in the section C-D, you have reached the midpoint of the work (= the top of the hood portion). Insert a stitch marker at this row.
Work straight until the second half of the hood reaches the last increases of the first half marked with a stitch marker. Now, start decreasing in the following way:
Next row (RS): Work in pattern to section D-E, p3, p2tog, work 12 sts in pattern (cable), p2tog, work to end in pattern.
Repeat these decreases every 2 cm for 3 times more on both sides of the cable, ie. at the points matching the increases on the other half. You have now 74 sts on the needles.
When the second half measures 116 cm and you have just worked row 24 in the section C-D, cast off all sts.
Finishing
Steam block the scarf gently.
Fold the piece in half along the top of the hood. Join the hood closed starting at the top of the hood and working 35 cm down along the back edge.
Make 5 tassels and attach one at the tip of the hood and the rest at the corners of the scarf.
