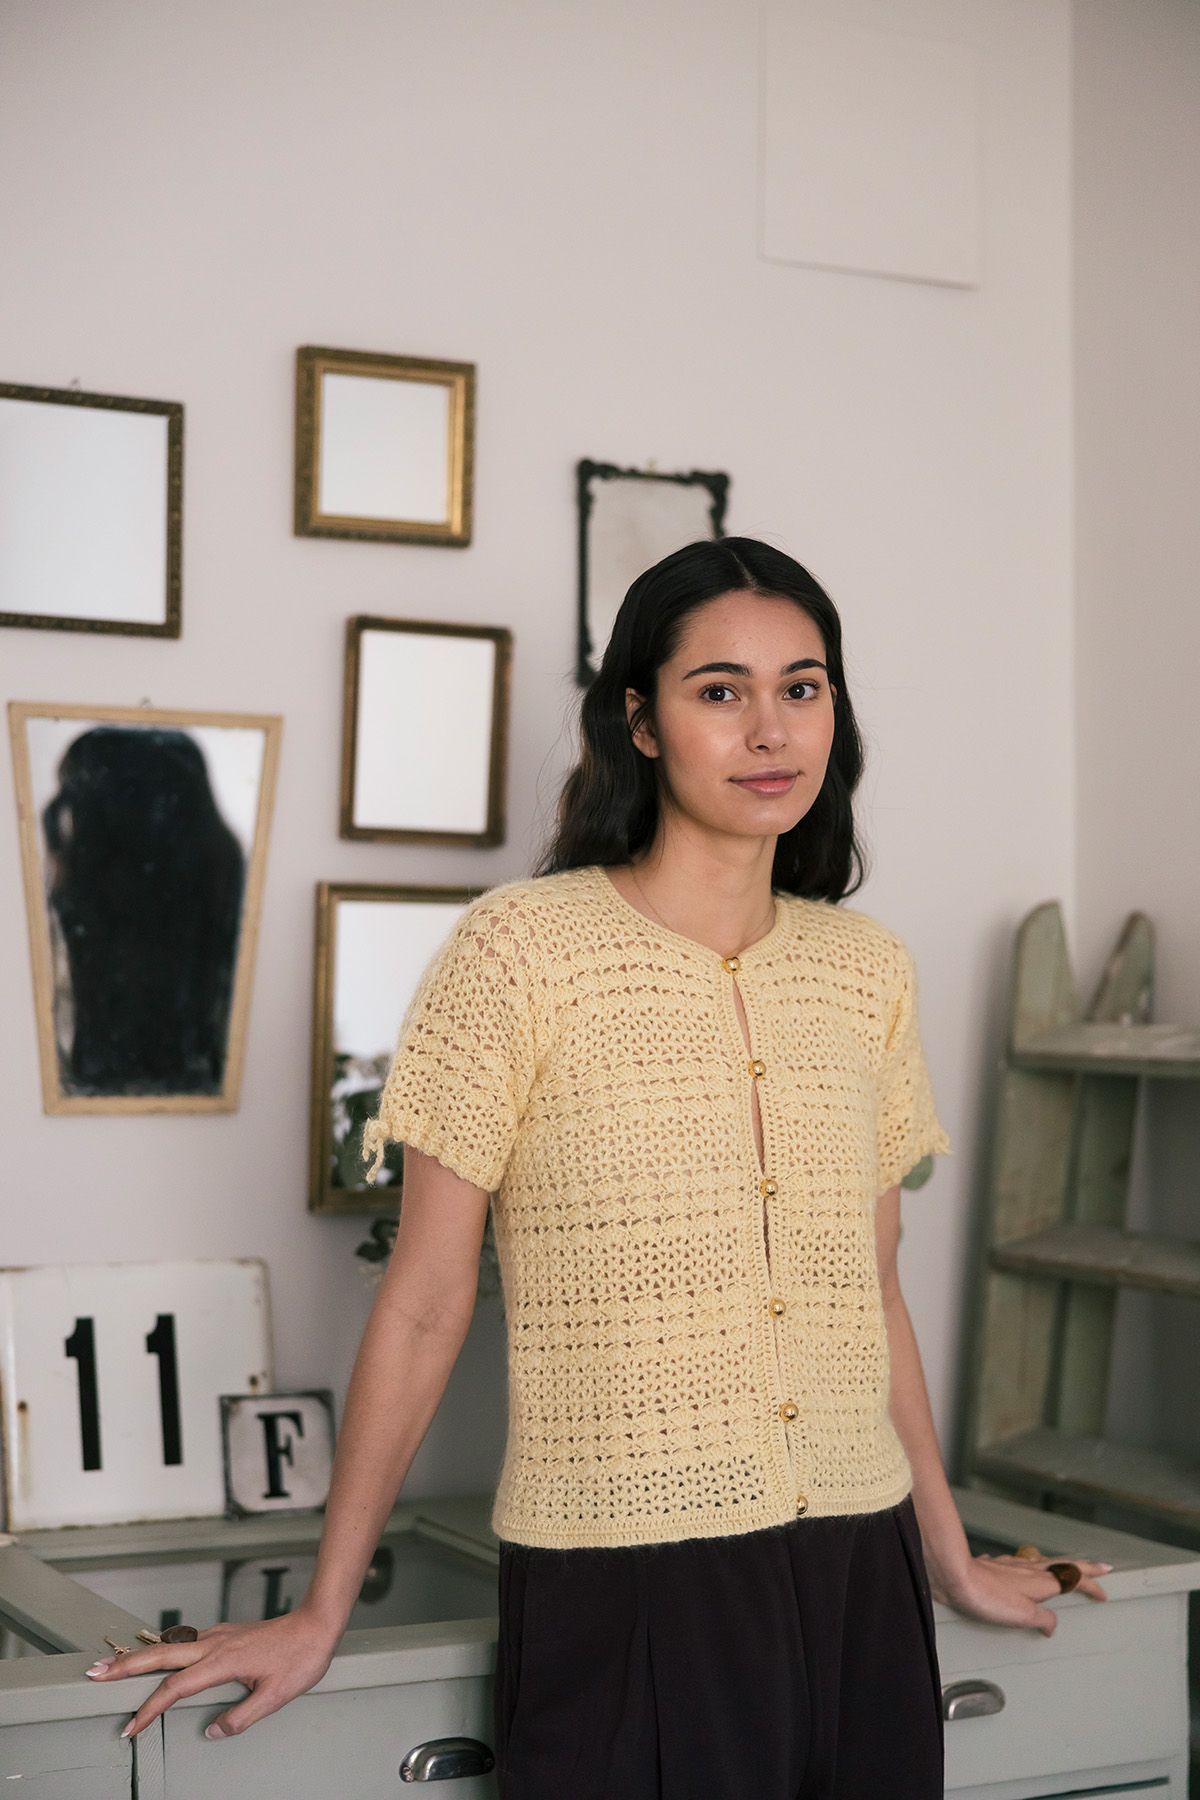
Women's cardigan Novita Natura
The brioche-like texture is created with simple knit and purl stitches - no yarn overs or slipped stitches needed. Knitted from Novita Natura.
Designer
Lea Petäjä
Language
Size(s)
XS(S)M/L(XL)XXL(3XL)
Finished dimensions
body circumference 96(104)112(120)128(136) cm / 37¾(41)44(47¼)50½(53½) in length 74(76)78(80)84(86) cm / 29¼(30)30¾(31½)33(33¾) in inner sleeve length 46(47)48(49)49(50) cm / 18(18½)19(19¼)19¼(19¾) in
Yarn demand
Novita Natura (065) Bear 600(650)700(750)800(850) g
Needles and other supplies
Needles: Novita 6 mm (UK 4 / US 10) or size needed to obtain gauge Novita 5 mm (UK 6 / US 8) needles for the pockets Other supplies 6 buttons
Finished dimensions
body circumference 96(104)112(120)128(136) cm / 37¾(41)44(47¼)50½(53½) in length 74(76)78(80)84(86) cm / 29¼(30)30¾(31½)33(33¾) in inner sleeve length 46(47)48(49)49(50) cm / 18(18½)19(19¼)19¼(19¾) in
Stitch patterns:
- Textured pattern:
work following the chart and the written instructions.
- Garter stitch:
knit all rows.
Gauge:
19 sts and 23 rows of textured st pattern = 10 cm / 4 in
Back
Cast on 93(102)108(117)123(129) sts and begin the textured st pattern on the WS from row 1 of the chart: work 1 st from the left end of the chart, work the 3 st pattern repeat 30(33)35(38)40(42) times, work 2 sts from the right end. Keep repeating rows 2-3 of the chart.
When the piece measures 58(59)60(62)65(66) cm, on every other row bind off at both ends 1x3(4)4(4)5(5) sts, 2(2)2(3)3(3)x2 sts, 8(9)10(8)10(11)x1 st, 2(2)2(3)2(2)x2 sts, and 1x3(3)3(4)4(4) sts for the armholes. Bind off the remaining 49(54)58(61)65(69) sts.
Left front
Cast on 52(55)58(61)64(67) sts and begin the textured st pattern on the WS from row 1 of the chart: work 5 sts in garter st, work the 3 st pattern repeat 15(16)17(18)19(20) times, work 2 sts from the right end. Keep working 5 sts at the front edge (left end) in garter st and keep repeating rows 2-3 of the chart.
When the piece measures 48(49)50(52)55(56) cm, begin slanting the neckline: work a RS row until 7 sts remain at the front edge, then k2tog, k5. Repeat the decrease every 4th row 12(11)12(9)8(8) more times and then every 6th row 0(0)0(2)3(3) times.
Note: When the piece measures 58(59)60(62)65(66) cm, on every other row bind off at both ends 1x3(4)4(4)5(5) sts, 2(2)2(3)3(3)x2 sts, 8(9)10(8)10(11)x1 st, 2(2)2(3)2(2)x2 sts, 1x3(3)3(4)4(4) sts, and 1x11(13)14(15)17(19) sts for the armhole. Leave the remaining 6 sts at the edge on hold.
Place markers for the buttons onto the front edge of the piece. The topmost button will be where the slanted neckline begins and the other five every 8(8)8(8,5)9(9) cm below it.
Right front
Work as the mirror image of the left front. Work the slanted neckline using skp decreases (= slip 1 knitwise, knit 1, pass the slipped st over). Work buttonholes at the proper spots: work 2 sts from the front edge, k2tog, yo, work to end of row.
Left sleeve
Cast on 45(45)48(48)51(51) sts and begin the textured st pattern on the WS from row 1 of the chart: work 1 st from the left end of the chart, work the 3 st pattern repeat 14(14)15(15)16(16) times, work 2 sts from the right end. Keep repeating rows 2-3 of the chart.
When the piece measures 11(11)12(11)11(11) cm, increase 1 st at both ends. Repeat the increases every 5(4,5)4,5(3,5)3,5(3) cm 6(7)7(10)10(12) more times = 59(61)64(70)73(77) sts. Also work the increased sts following the textured pattern.
When the piece measures 46(47)48(49)49(51) cm, on every other row bind off at both ends 1x3(3)3(3)4(4) sts, 2(2)2(3)3(3)x2 sts, 8(9)10(8)10(11)x1 st, 3(3)3(3)2(2)x2 sts, 0(0)0(1)1(0)x3 sts, and 0(0)0(0)0(1)x4 sts.
Work the remaining 17(17)18(18)19(19) sts following the textured st pattern. After 6,5(6,5)7(8)8,5(9,5) cm, bind off 8(8)9(9)9(9) sts at the left end on a WS row. Continue working the 9(9)9(9)10(10) remaining sts following the textured st pattern. After 7,5(7,5)8(8)8,5(8,5) cm, bind off.
Right sleeve
Work as the mirror image of the left sleeve.
Finishing
Attach the sleeves following the markers on the pattern. Sew together the top edges of the sleeves (the back middle seam).
Pick up the 6 sts on hold from one of the front pieces and cast on 1 extra st at the shoulder = 7 sts. Continue working these sts until you reach the back midpoint if you stretch the fabric lightly. Work the other side of the collar in the same way and sew the seam in the back.
Sew the side seams and the sleeve seams.
Pockets: Cast on 36 sts and begin the textured st pattern on the WS from row 1 of the chart: work 1 st from the left end of the chart, work the 3 st pattern repeat 11 times, work 2 sts from the right end. Keep repeating rows 2-3 of the chart. When the piece measures 16 cm, switch to the smaller needles and work 4 rows in garter st. Bind off securely, making sure the top edge doesn't stretch.
Knit the other pocket to match.
Attach the pockets approx. 34(34)35(35)36(36) cm below the armholes and approx. 2(2)2(3)3(3) cm from the side seams.
Attach the buttons.
Women's cardigan Novita Natura
Size(s)
XS(S)M/L(XL)XXL(3XL)
Finished dimensions
body circumference 96(104)112(120)128(136) cm / 37¾(41)44(47¼)50½(53½) in length 74(76)78(80)84(86) cm / 29¼(30)30¾(31½)33(33¾) in inner sleeve length 46(47)48(49)49(50) cm / 18(18½)19(19¼)19¼(19¾) in
Yarn demand
Novita Natura (065) Bear 600(650)700(750)800(850) g
Needles and other supplies
Needles: Novita 6 mm (UK 4 / US 10) or size needed to obtain gauge Novita 5 mm (UK 6 / US 8) needles for the pockets Other supplies 6 buttons
Stitch patterns:
- Textured pattern:
work following the chart and the written instructions.
- Garter stitch:
knit all rows.
Gauge:
19 sts and 23 rows of textured st pattern = 10 cm / 4 in
Back
Cast on 93(102)108(117)123(129) sts and begin the textured st pattern on the WS from row 1 of the chart: work 1 st from the left end of the chart, work the 3 st pattern repeat 30(33)35(38)40(42) times, work 2 sts from the right end. Keep repeating rows 2-3 of the chart.
When the piece measures 58(59)60(62)65(66) cm, on every other row bind off at both ends 1x3(4)4(4)5(5) sts, 2(2)2(3)3(3)x2 sts, 8(9)10(8)10(11)x1 st, 2(2)2(3)2(2)x2 sts, and 1x3(3)3(4)4(4) sts for the armholes. Bind off the remaining 49(54)58(61)65(69) sts.
Left front
Cast on 52(55)58(61)64(67) sts and begin the textured st pattern on the WS from row 1 of the chart: work 5 sts in garter st, work the 3 st pattern repeat 15(16)17(18)19(20) times, work 2 sts from the right end. Keep working 5 sts at the front edge (left end) in garter st and keep repeating rows 2-3 of the chart.
When the piece measures 48(49)50(52)55(56) cm, begin slanting the neckline: work a RS row until 7 sts remain at the front edge, then k2tog, k5. Repeat the decrease every 4th row 12(11)12(9)8(8) more times and then every 6th row 0(0)0(2)3(3) times.
Note: When the piece measures 58(59)60(62)65(66) cm, on every other row bind off at both ends 1x3(4)4(4)5(5) sts, 2(2)2(3)3(3)x2 sts, 8(9)10(8)10(11)x1 st, 2(2)2(3)2(2)x2 sts, 1x3(3)3(4)4(4) sts, and 1x11(13)14(15)17(19) sts for the armhole. Leave the remaining 6 sts at the edge on hold.
Place markers for the buttons onto the front edge of the piece. The topmost button will be where the slanted neckline begins and the other five every 8(8)8(8,5)9(9) cm below it.
Right front
Work as the mirror image of the left front. Work the slanted neckline using skp decreases (= slip 1 knitwise, knit 1, pass the slipped st over). Work buttonholes at the proper spots: work 2 sts from the front edge, k2tog, yo, work to end of row.
Left sleeve
Cast on 45(45)48(48)51(51) sts and begin the textured st pattern on the WS from row 1 of the chart: work 1 st from the left end of the chart, work the 3 st pattern repeat 14(14)15(15)16(16) times, work 2 sts from the right end. Keep repeating rows 2-3 of the chart.
When the piece measures 11(11)12(11)11(11) cm, increase 1 st at both ends. Repeat the increases every 5(4,5)4,5(3,5)3,5(3) cm 6(7)7(10)10(12) more times = 59(61)64(70)73(77) sts. Also work the increased sts following the textured pattern.
When the piece measures 46(47)48(49)49(51) cm, on every other row bind off at both ends 1x3(3)3(3)4(4) sts, 2(2)2(3)3(3)x2 sts, 8(9)10(8)10(11)x1 st, 3(3)3(3)2(2)x2 sts, 0(0)0(1)1(0)x3 sts, and 0(0)0(0)0(1)x4 sts.
Work the remaining 17(17)18(18)19(19) sts following the textured st pattern. After 6,5(6,5)7(8)8,5(9,5) cm, bind off 8(8)9(9)9(9) sts at the left end on a WS row. Continue working the 9(9)9(9)10(10) remaining sts following the textured st pattern. After 7,5(7,5)8(8)8,5(8,5) cm, bind off.
Right sleeve
Work as the mirror image of the left sleeve.
Finishing
Attach the sleeves following the markers on the pattern. Sew together the top edges of the sleeves (the back middle seam).
Pick up the 6 sts on hold from one of the front pieces and cast on 1 extra st at the shoulder = 7 sts. Continue working these sts until you reach the back midpoint if you stretch the fabric lightly. Work the other side of the collar in the same way and sew the seam in the back.
Sew the side seams and the sleeve seams.
Pockets: Cast on 36 sts and begin the textured st pattern on the WS from row 1 of the chart: work 1 st from the left end of the chart, work the 3 st pattern repeat 11 times, work 2 sts from the right end. Keep repeating rows 2-3 of the chart. When the piece measures 16 cm, switch to the smaller needles and work 4 rows in garter st. Bind off securely, making sure the top edge doesn't stretch.
Knit the other pocket to match.
Attach the pockets approx. 34(34)35(35)36(36) cm below the armholes and approx. 2(2)2(3)3(3) cm from the side seams.
Attach the buttons.