I'm so mohair Signature Edition
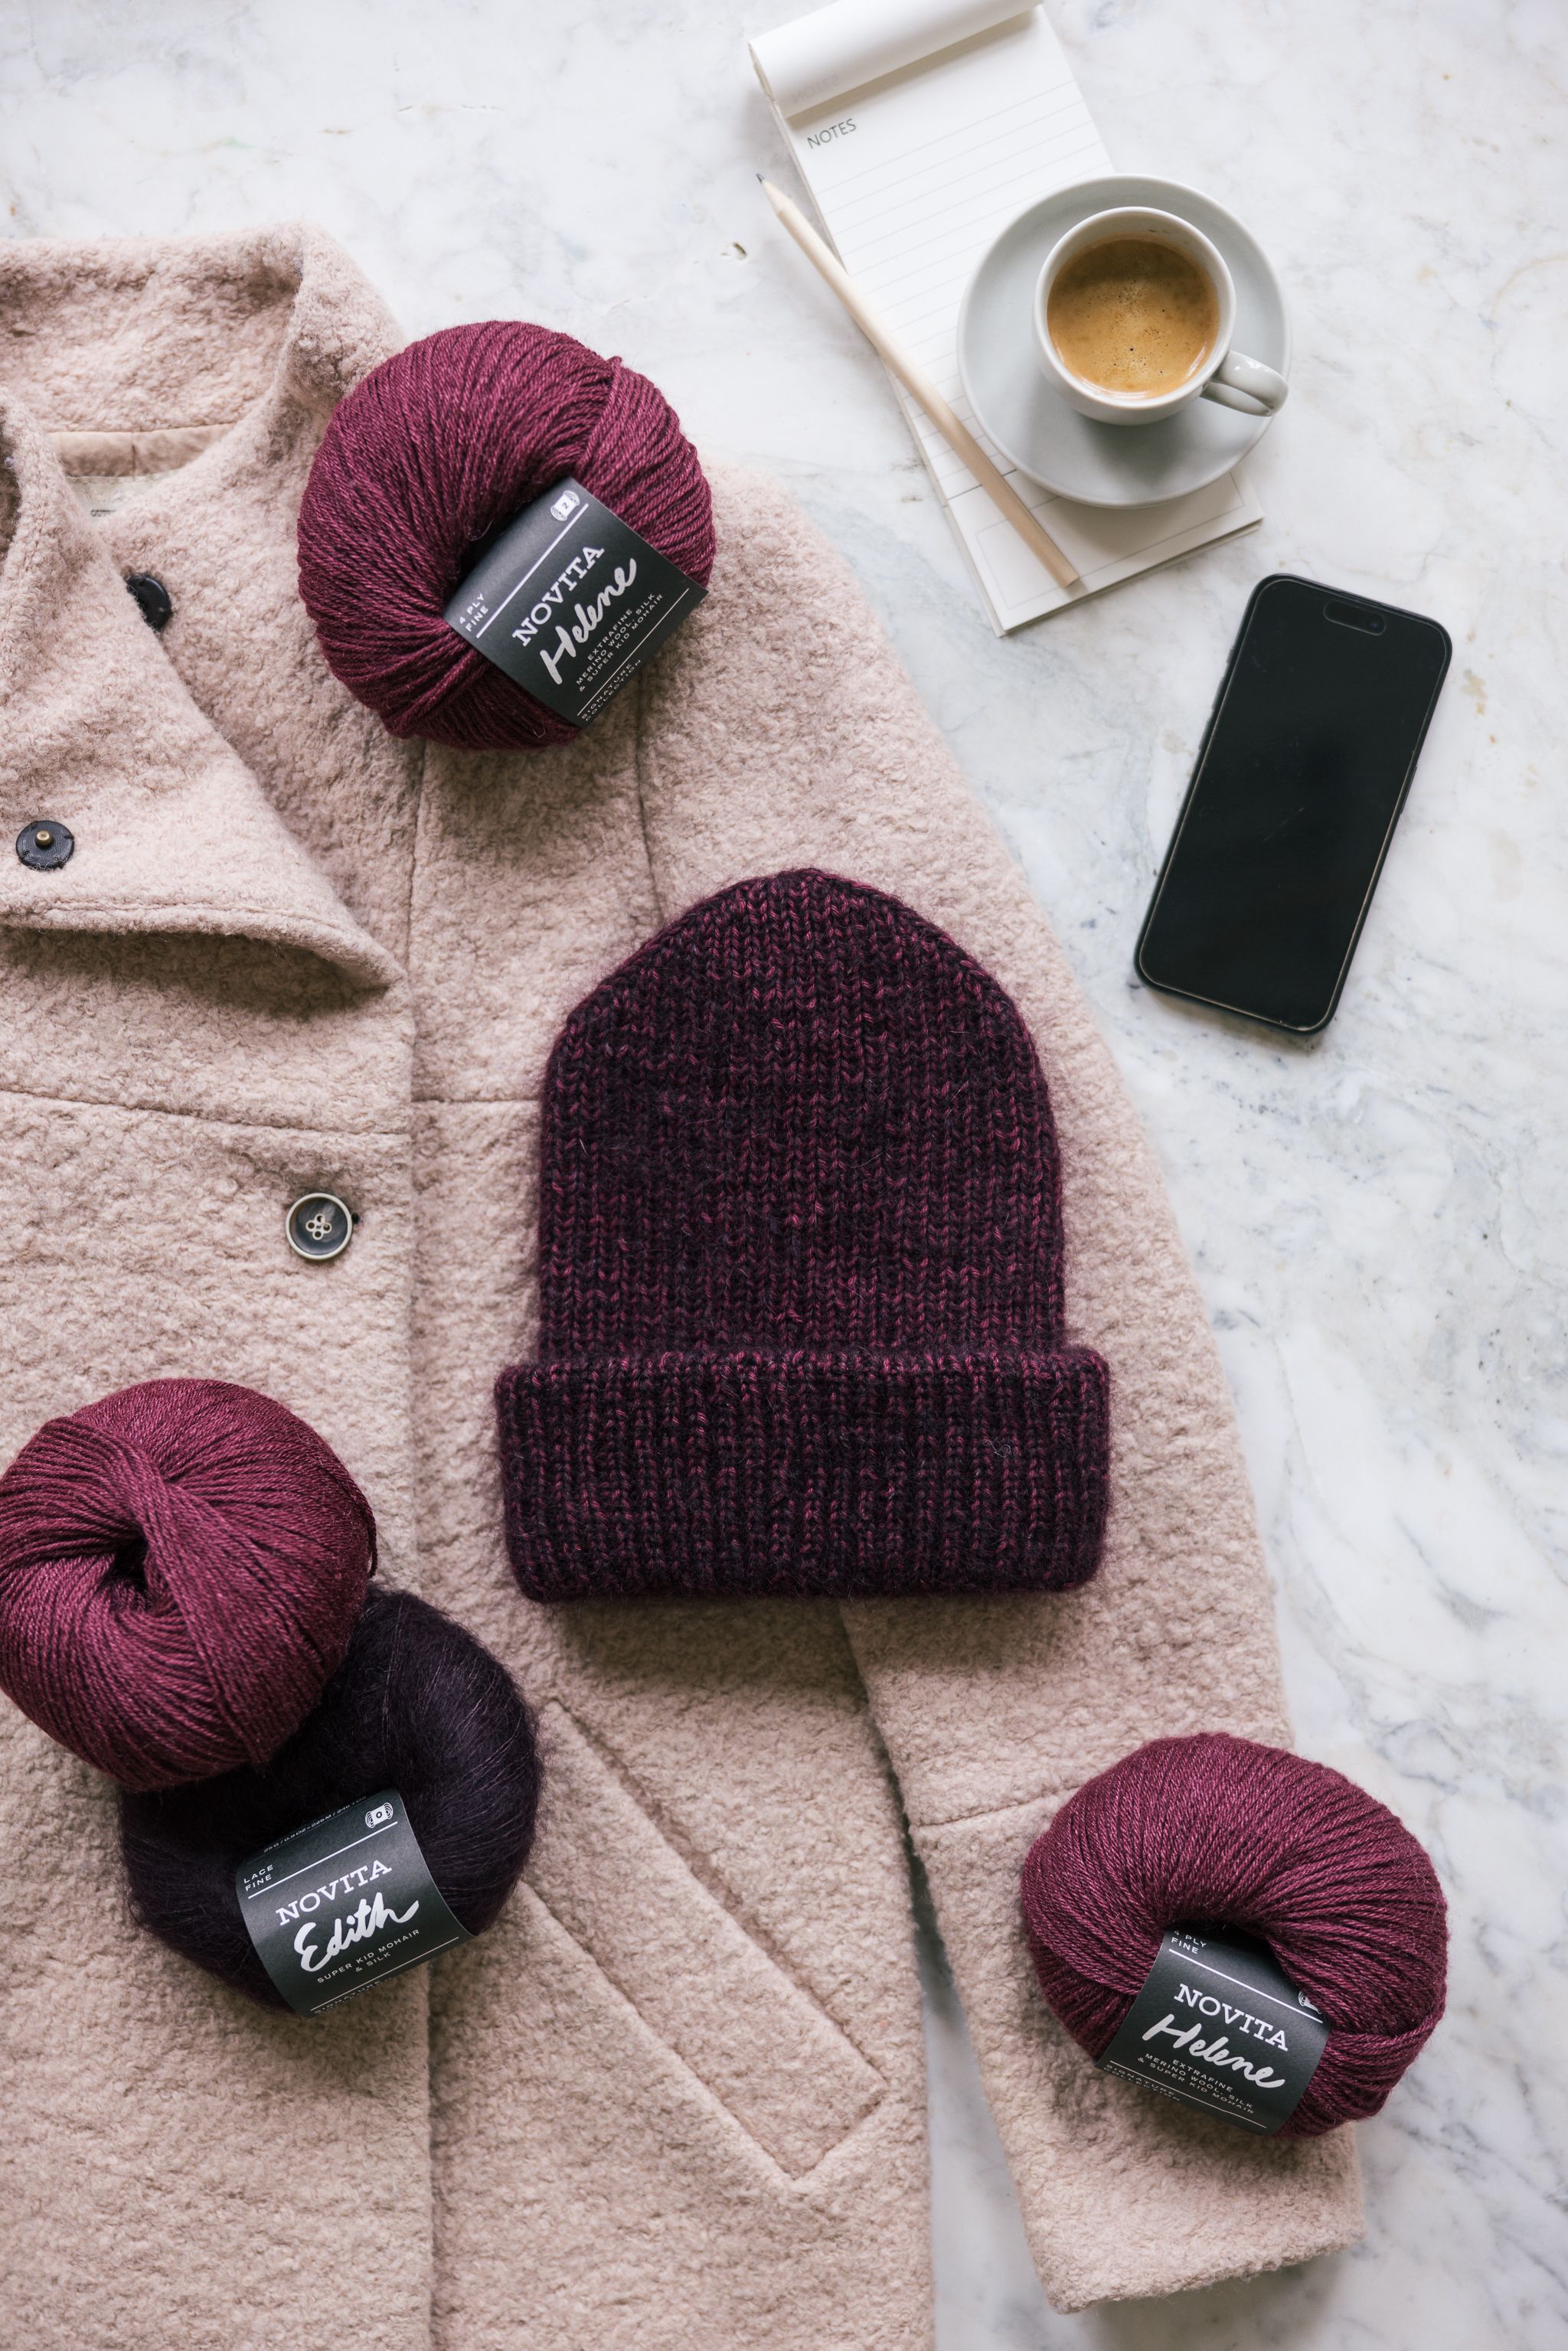
I’m So Mohair is one of the most popular Novita beanie patterns, and deservedly so! Designed by Henna Ketonen, this simple yet stylish rib-knit beauty looks good on everyone.
Designer
Henna Ketonen
Language
Size(s)
One size
Yarn demand
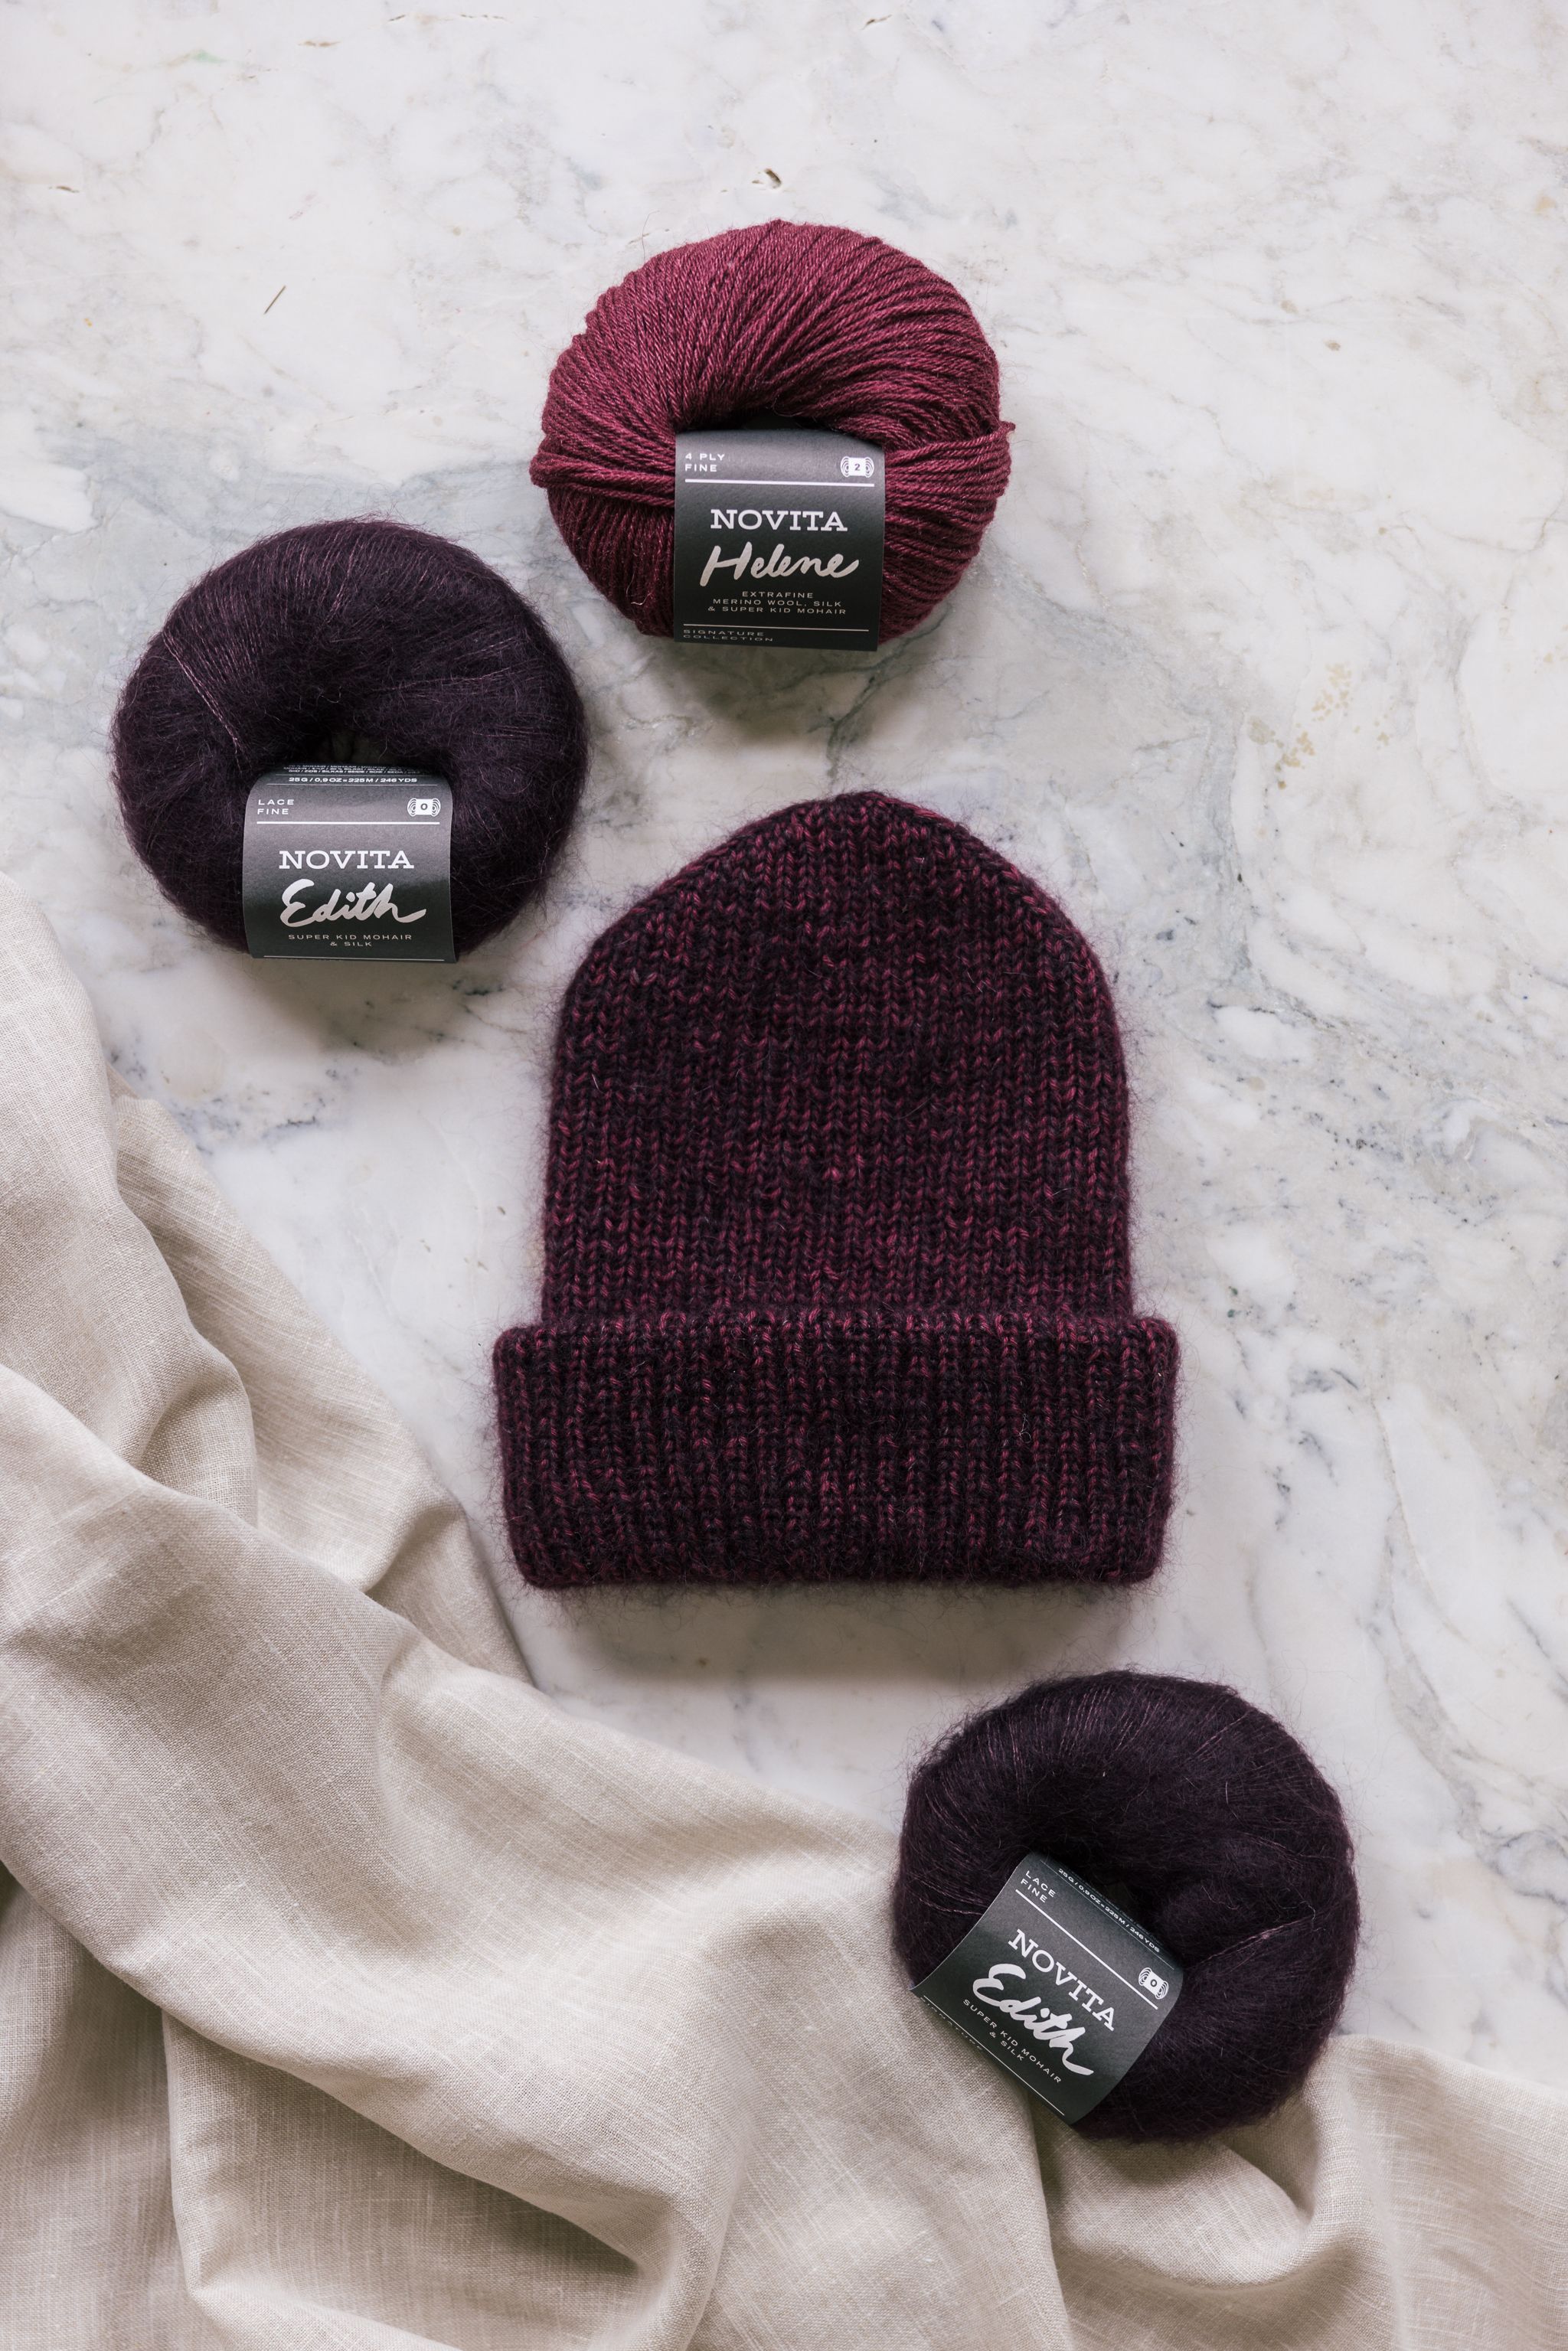
Novita Helene (5781) lipstick 50 g Novita Edith (7851) feelings 50 g This project is worked with three strands of yarn held together: 1 strand of Helene and 2 strands of Edith
Needles and other supplies
Circular needles (40 cm/16 in) and double pointed needles (for decreases) Novita 3.5 mm (4 US) or as required to meet gauge (you can also opt for a longer circular needle if using Magic Loop technique or go with DPNs only). Accessories: 4 stitch markers.
Gauge swatch k1, p1 rib knit in the round: *knit 1, purl 1*, repeat *-*-
Tension 26 sts and 26 rows of rib without stretching = 10 cm
Description This beanie is worked from bottom to top in the round.
Using all three strands of yarn (1 x Helene and 2 x Edith), cast on 96 stitches loosely. Work in k1, p1 rib until your work measures 34 cm (13.5 in). On your last round and before starting your decreases, place 4 stitch markers as follows: insert the 1st stitch marker between the last (purl) stitch and the first (knit) stitch, i.e. at the beginning of a new round. This marks wbeanie will be the middle back of your beanie. Now insert the remaining stitch markers every 24 sts. You can leave out the 3rd stitch marker (middle front) if you prefer, though this will make counting your stitches a little harder. The decreases are worked on either side of the 2nd and 4th stitch markers (on the sides of your beanie).
Decreases
From the 1st stitch marker, continue in rib stitch until 3 sts remain before the 2nd stitch marker. Knit two sts together (k2tog) here and purl the final st. After the 2nd stitch marker, k1, p1 and work a slip, slip, knit decrease (ssk) by slipping two sts knitwise one at a time from your left needle onto the right needle. To finish the decrease, slip them back to the left needle and knit together through the back loop (k2tog tbl). Continue in rib until the 3rd stitch marker.
After the 3rd stitch marker, continue in rib until 3 sts remain before the 4th stitch marker. K2tog here and purl the final st. After the stitch marker, k1, p1 and ssk. Work to the end of the round. Now continue to work these decreases on every round until 48 sts remain. If using a 40 cm (16 in) circular needle, switch to DPNs when necessary.
When 48 sts remain, work the decreases as follows: work the first 8 sts in rib. Knit the next 3 sts together (k3tog) and purl the final st before the 2nd stitch marker. After the stitch marker, k1, p1 and sssk by slipping the next 3 sts knitwise onto the right needle, slip them back onto the left needle and knit them together through the back loop. Work the same decreases on either side of the 4th stitch marker and knit to end of round.
Continue to work these sssk decreases until 16 sts remain. Break yarn, thread the tail through remaining stitches and finish off. If you weave in your yarn tail as invisibly as possible, your beanie becomes reversible and can be worn either way. This is because the decreases also look beautiful on the reverse.
Finishing
Weave in ends, then fold twice as desired. And now you’re done!
I'm so mohair Signature Edition
Size(s)
One size
Yarn demand
Novita Helene (5781) lipstick 50 g Novita Edith (7851) feelings 50 g This project is worked with three strands of yarn held together: 1 strand of Helene and 2 strands of Edith
Needles and other supplies
Circular needles (40 cm/16 in) and double pointed needles (for decreases) Novita 3.5 mm (4 US) or as required to meet gauge (you can also opt for a longer circular needle if using Magic Loop technique or go with DPNs only). Accessories: 4 stitch markers.
Gauge swatch k1, p1 rib knit in the round: *knit 1, purl 1*, repeat *-*-
Tension 26 sts and 26 rows of rib without stretching = 10 cm
Description This beanie is worked from bottom to top in the round.
Using all three strands of yarn (1 x Helene and 2 x Edith), cast on 96 stitches loosely. Work in k1, p1 rib until your work measures 34 cm (13.5 in). On your last round and before starting your decreases, place 4 stitch markers as follows: insert the 1st stitch marker between the last (purl) stitch and the first (knit) stitch, i.e. at the beginning of a new round. This marks wbeanie will be the middle back of your beanie. Now insert the remaining stitch markers every 24 sts. You can leave out the 3rd stitch marker (middle front) if you prefer, though this will make counting your stitches a little harder. The decreases are worked on either side of the 2nd and 4th stitch markers (on the sides of your beanie).
Decreases
From the 1st stitch marker, continue in rib stitch until 3 sts remain before the 2nd stitch marker. Knit two sts together (k2tog) here and purl the final st. After the 2nd stitch marker, k1, p1 and work a slip, slip, knit decrease (ssk) by slipping two sts knitwise one at a time from your left needle onto the right needle. To finish the decrease, slip them back to the left needle and knit together through the back loop (k2tog tbl). Continue in rib until the 3rd stitch marker.
After the 3rd stitch marker, continue in rib until 3 sts remain before the 4th stitch marker. K2tog here and purl the final st. After the stitch marker, k1, p1 and ssk. Work to the end of the round. Now continue to work these decreases on every round until 48 sts remain. If using a 40 cm (16 in) circular needle, switch to DPNs when necessary.
When 48 sts remain, work the decreases as follows: work the first 8 sts in rib. Knit the next 3 sts together (k3tog) and purl the final st before the 2nd stitch marker. After the stitch marker, k1, p1 and sssk by slipping the next 3 sts knitwise onto the right needle, slip them back onto the left needle and knit them together through the back loop. Work the same decreases on either side of the 4th stitch marker and knit to end of round.
Continue to work these sssk decreases until 16 sts remain. Break yarn, thread the tail through remaining stitches and finish off. If you weave in your yarn tail as invisibly as possible, your beanie becomes reversible and can be worn either way. This is because the decreases also look beautiful on the reverse.
Finishing
Weave in ends, then fold twice as desired. And now you’re done!